 by Steven D. Johnson
Racine, Wisconsin
(Page 2 of 5)
Previous Page
1
2
3
4
5
Next Page
Wrong Turns
Sometimes, though, we hit a detour. Sometimes the tried and true route leads us astray. Sometimes we simply make a wrong turn. This wrong turn was a doozy…

|
|
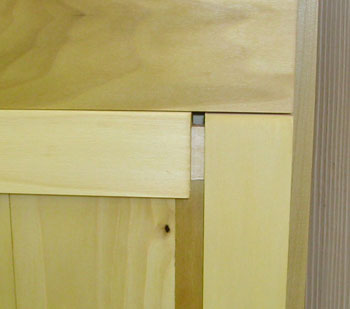
Figure 3 - Bad design + poor execution = big problem!
|
Whenever I have made doors with floating solid wood panels, an eighth of an inch space all the way around has always been enough for seasonal expansion. Not this time, though.
Maybe it was the fact I built this cabinet during the dead of winter. Maybe it is was the unusually hot and humid summer. Maybe Poplar expands and contracts more than the woods I normally use. Whatever the reason, looking at this door everyday has been driving me crazy, so I decided to back up, turn around, quit procrastinating, and fix it.
Titebond offers a wealth of product information on their web site, and for the glue I used, heat is recommended for loosening the bond. Since only the mortise and tenon joints in the door corners were glued, the road to redemption looked relatively easy, but there were a few roadblocks along the way.

|
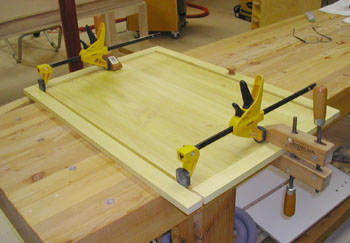
Figure 4 - Clamps convert to spreaders to
help disassemble the door
|
The destination was clear and the route seemed obvious. Loosen the glue, remove one stile, trim the panel, re-glue the tenons of the rails into the stiles and remount the door to the cabinet. But first I needed to find a source of heat to loosen the glue. With my spouse away, it seemed innocent (and safe) enough to borrow her hairdryer. One barrier passed.
The door could be clamped to the bench, but I would need several hands to apply heat evenly to the two corners of the door and simultaneously pry the tenons from their mortises. I have a couple of those quick clamps that can be reversed into spreaders, but they are not nearly long enough to span the stiles of the door. It took a bit of noodling, but the answer was to place two screw clamps about midway down the rails of the door and then use the spreaders between the clamps on one side and the stile on the other. Another roadblock cleared.

|
|
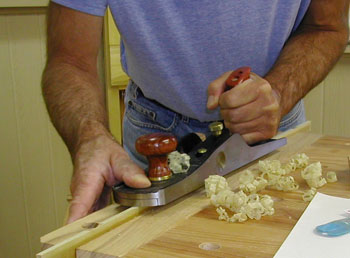
Figure 5 - Planing the panel down to size
|
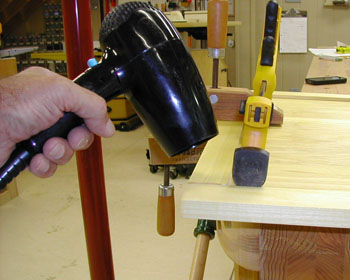
Bit by bit I heated each corner and gradually increased the pressure on the clamp "spreaders." Titebond glue is really tough stuff, and getting it to "give up" its hold is not easy. With patience, though, I passed another small bump in the road.
It was then a relatively simple matter to trim, via hand plane, the edge of the wood insert panel. I removed another eighth of an inch, probably a little more than necessary. The tenons were sanded lightly to remove any remaining glue, the mortise cleaned with a smile rasp, and the door was glued back together. The last milestone on this side journey...almost home.
Unfortunately, just as I was turning the hair dryer off, I heard a loud pop, a sizzle, and then the unmistakable death rattle of the dryer. True panic set in. There loomed a distinct possibility that the surreptitious use of the hair dryer in my wood shop might result in my premature death as well. I spent the rest of the afternoon shopping for as near a match as possible for that dead hair dryer. Somehow, someday, I will likely pay dearly for borrowing that hairdryer. Hopefully it will just be a fender-bender, and not an all-out crash.

|
|
Figure 6 - Did I mention how much trouble I am in for ruining this hairdryer?
|
(Page 2 of 5)
Previous Page
1
2
3
4
5
Next Page
Return to Wood News front page
