
 by Steven D. Johnson
Racine, Wisconsin
(Page 2 of 4)
Previous Page
1
2
3
4
Next Page
Kreg Does It Again With Shelf Pin Drilling Jig
On the recently completed miter saw workstation and most recently on a lingerie chest, I needed to drill shelf pin holes "in situ." Drilling accurately spaced holes on a cabinet wall in an already-assembled piece is at best, tricky and at worst, frustrating.
|
|
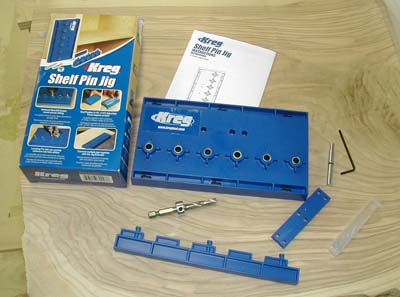
Figure 1 - The Kreg Shelf Pin Jig kit and all its parts
|
A friend loaned me his Kreg Shelf Pin Jig, and I liked it enough that I subsequently bought one for myself. Like most Kreg products, the jig satisfies woodworkers' needs at a reasonable price and with a high degree of quality. There are some noteworthy nuances, however.
|
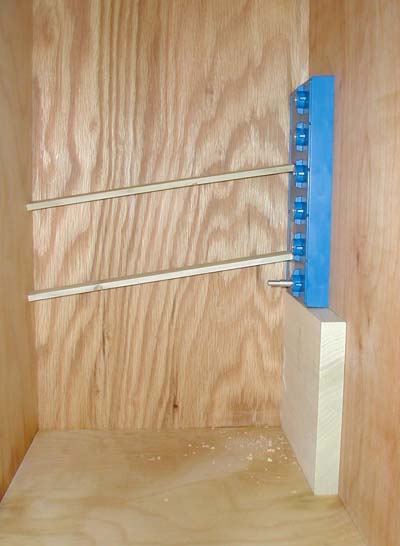
Figure 2 - A makeshift torsion
clamp in the back of the cabinet
|
The jig is made of their familiar blue glass reinforced nylon, same as their pocket hole jigs and the Deck Jig™. It is sturdy, but can flex a bit under pressure. I used the Kreg Large Face Clamp to position the pin hole drilling jig for the front holes in the cabinet, and if adjusted too tightly, some flexing will occur. There is really no need for Samson-like clamping, though, because Kreg supplies a handy indexing pin. After drilling the first hole, the indexing pin and a little light pressure will hold the jig in place. In the back of the cabinet, I just used a couple of thin scraps wedged across the cabinet to hold the jig in place while drilling.
|
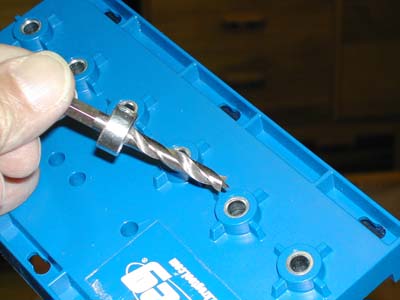
Figure 3 - The stubby provided bradpoint
drill bit and stop collar. Note the excellent
steel drill guide bushings.
|
Speaking of drilling, Kreg supplies a sharp brad point bit in the size you specify when ordering (depending on whether you prefer 1/4" or 5mm shelf pins). Also provided is a stop collar so that the depth of hole can be set and maintained with consistency. The drill bit is a nice short length that really comes in handy when drilling inside an already assembled cabinet. Order extras...the short ones are hard to find. One additional note for Festool users...The provided quick-change hex shank drill bit will not fit in the Centrotec chuck. It does fit, sort of loosely, in the drill spindle, and fits pretty well in the spindle on the right-angle attachment. You can, of course, use a standard clamping-style chuck or any other type of quick-change drill, drill chuck, or accessory.
|
|
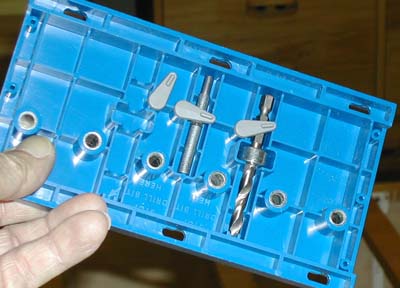
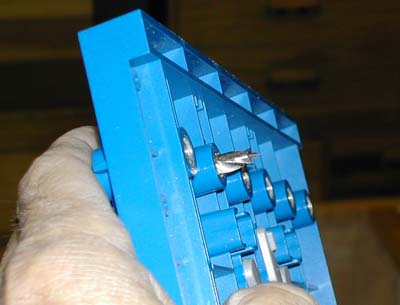
Figure 4 - The back side of the Kreg jig
offers onboard storage.
|
Figure 5 - Push the drill bit through the jig and
measure the protrusion to set the stop collar.
|
The drill bit with the stop collar attached and the indexing pin can be stored on the back of the jig itself. There is even a spot for an additional drill bit and stop collar. If you are accustomed to the Kreg pocket hole jig and the thoughtfully provided gauge for setting the drill bit stop collar, you may think that the storage on the back of the shelf pin jig is also a handy way to position the stop collar...don't do it. Better to extend the bit through one of the steel drill guides on the jig and set the depth of cut accordingly.
|
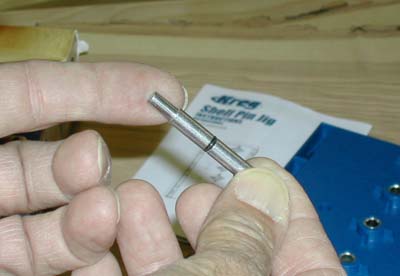
Figure 6 - The slick indexing pin. Hard to grasp
but infinitely better than using a dowel.
|
The indexing pin has an o-ring in a groove that helps keep the pin in place in the jig. One small gripe...really small, actually. The indexing pin is reversible for either 1/4" or 5mm holes. When it is time to pull the indexing pin free and move the jig up for the next batch of holes, it is very difficult to get a grip on the pin and remove it from the hole. I would gladly pay a couple of bucks extra to get two indexing pins (one of each size) with a cross hatch or grooved design on one end that would make it easier to grip the pin and remove it.
The all-star feature of this jig is the six beefy steel drill guide bushings. Each is 1" deep, so drill alignment is assured. All the holes will be straight and true (this is the biggest impediment to using other shelf pin jigs on the market or homemade jigs and to successfully drilling holes in situ).
The kit includes a "jig extender" that ostensibly allows you to connect two jigs together and drill up to 12 holes in a row without moving the jig. Unfortunately, whether it is a manufacturer or distributor issue, I have yet to find anyone that sells the jig body as a separate piece. I suppose I could just buy an additional kit, but hey, you know…
A snap-in fence can be placed on the jig allowing you to reference off an edge and depending on which side you mount the fence, holes will be nominally positioned about 1" or 2" from the edge. Without the fence, the jig can be easily referenced from a cabinet back or a face frame. Without the fence, the holes will be approximately 1 1/2" or 2 1/2" from the edge, depending on how you orient the jig. Vertically, the holes are spaced 1 1/4" (32mm) on center.
The jig and all its little parts come in a thin-walled cardboard box. If the company ever decides to sell a slightly more expensive "deluxe" version of the kit, perhaps with two sizes of bits, a spare, and a pair of new "knurled" indexing pins, a small plastic case to hold all the parts would be an irresistible deal-sweetener.
If you break down shelf pin drilling jigs into two broad categories – those that are to be used before assembly on a smooth flat work piece and those that can also be used post-assembly, this is by far the best post-assembly jig on the market. Ease of use, value, and particularly the deep steel guide bushings put the Kreg Shelf Pin Jig in a class all its own. Like their ubiquitous pocket hole system, Kreg has scored again with this handy must-have accessory available for just $35.
(Page 2 of 4)
Previous Page
1
2
3
4
Next Page
Return to Wood News front page
