 by Steven D. Johnson
Racine, Wisconsin
(Page 3 of 3)
Previous Page
1
2
3
A Coffee Lover's Coffee Table, Pt. 1
A while back my spouse accompanied me to the hardwood lumber supplier. It was her first, and so far only, visit. She was impatient, but it worked out, because she saw and fell in love with (and let me buy) two big Ash slabs that were book matched...sequentially cut from the same log.
We decided these slabs would make nice natural edge coffee tables. After sketching a few designs for the leg and apron assembly I got the final go-ahead from my "customer."
The slabs will get a smidge smaller as they are flattened and the bark is removed, but it was easy enough to get the general dimensions and start building the undercarriage. I started with the legs.
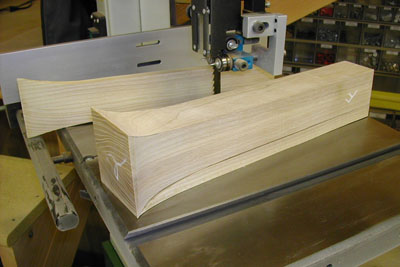
After milling some Ash planks, I made up square stock, roughly 5 X 5 and cut ten pieces to length (8 legs and 2 spares). Then with a template, I drew the curve and taper onto each side of each leg. At the band saw I freehand cut each taper. After each cut, I taped the off-cut back into place, turned the blank, and made the next cut.

|

|
Figure 13 - After each cut, tape the offcut in place
and make the next cut.
|
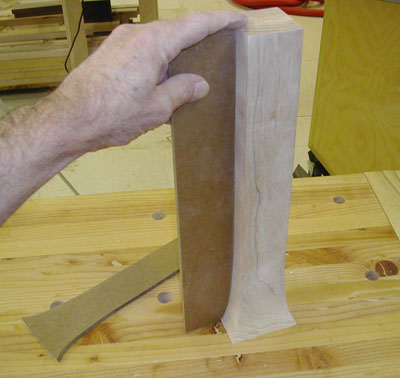
Figure 14 - The original template and the
"mirror" template checking the shaping progress.
|
The taper is relatively pronounced, particularly near the foot of the leg, so I was cutting away a lot of material. With freehand band saw cutting, I stay safely away from the line, so there was quite a bit of additional shaping to do.

|
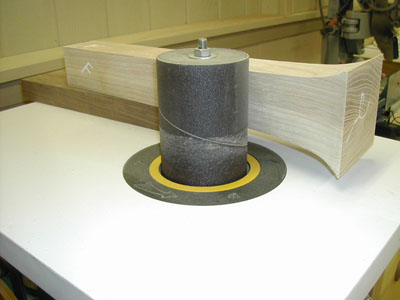
Figure 15 - A scrap holds the leg up and
level for final shaping on the spindle sander.
|
Using the original template, I cut out a mirror image template and used that as a "go by" to guide my shaping efforts. I used a round spokeshave to get close to the original layout lines, then moved to the oscillating spindle sander. Because of the big flair at the bottom of the leg, I used double-stick tape to mount a 3/4" block of wood to the worktable on which I could rest each leg. This allowed me to keep the leg level and square to the sanding drum as I shaped each piece.
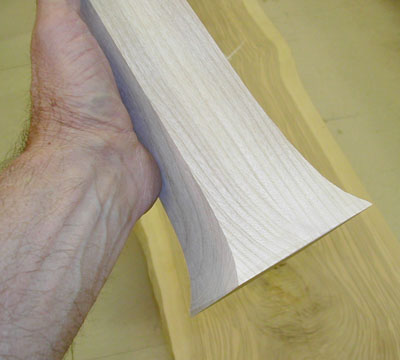
Because of the shape of the legs and the way the grain is oriented, it appears that the taper goes all the way to the top, but actually the top 5 inches of each leg is square. This was done to accommodate the aprons.

|
|
Figure 16 - An almost-finished leg.
|
Next month I will show you how I shaped the aprons and used the Festool Domino joiner to assemble them. Then the really fun part starts. The table tops are going to appear to "float" so I had to do a little creative design work on the supports. As with any large slab, the attachment method must allow for expansion and contraction. This got a little tricky. The cross brace "floats" are getting installed with contrasting dowels. The slabs are going to need a few butterfly keys and some work on a couple of knots. All fun stuff!
See you next month!
(Page 3 of 3)
Previous Page
1
2
3
Steven Johnson is retired from an almost 30-year career selling medical equipment and
supplies, and now enjoys improving his shop, his skills, and his designs on a full time basis
(although he says home improvement projects and furniture building have been hobbies for most of his
adult life).
Steven can be reached directly via email at downtoearthwoodworks@me.com.
Return to Wood News front page
