 by Steven D. Johnson
Racine, Wisconsin
(Page 2 of 5)
Previous Page
1
2
3
4
5
Next Page
Mobile Sanding Center – Finalized Design
Click on any picture to see a larger version.
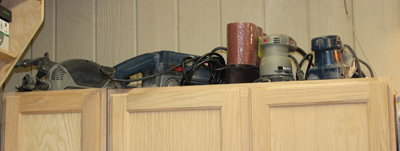
Last month I started noodling through the design criteria for a new mobile sanding center for the shop. The cabinet needs to support a spindle sander, a combination disc/belt sander, and possibly a future piece of sanding equipment (anyone see a flap sander in the future?). Importantly, the new sanding center will also need to house all my other sanding paraphernalia in one organized space.

|
|
Figure 4 - All these sanders will soon be appropriately stowed
|
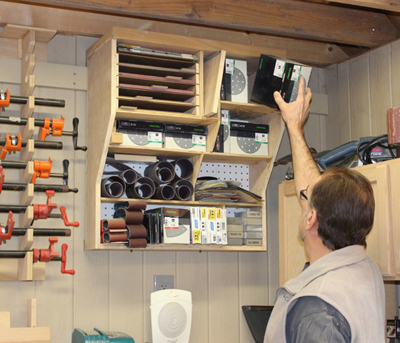
The cabinet, as it turns out, will not be small. But at 42 inches long, 26 inches wide, and 31 inches high, it will take up only half a square foot more floor space than the old splayed-leg metal stand it will replace (7.58 sq. ft. versus 7.33 sq. ft. before), and will eliminate a wall-hung sanding supply rack, will clear up space where sanders are stored on top of a cabinet, and will empty a couple of drawers from other cabinets in my shop.

|
|
Figure 5 - This will soon be gone...more space for clamps!
|
As the design currently stands, there will be seven drawers. Four of these will be at the operator position for the oscillating spindle sander and three will be at one of the operator positions for the combination belt/disc sander.
Laying everything out on the floor or on tabletops and taking measurements helped to determine drawer dimensions. The seven drawers will hold [1] miscellaneous pad, belt, and jitterbug sanders, [2] an assortment of Festool sanding disc boxes, [3] sanding sleeves (up to 6 inches in length), [4] sheet sandpaper (in a storage compartment that allows sorting and labeling various grits and grades), [5] belts and discs for the new combo sander, and [6 & 7] miscellaneous "junk." "Junk" is not the best word, but "miscellaneous" doesn't quite do it, nor does "eclectic" --- so I will just continue to call these "junk" drawers. You surely have one or two of these in the kitchen, right? And what else would you call a drawer that holds used, but not entirely used-up, sandpaper?

|
|
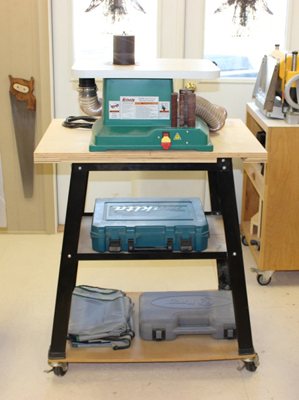
Figure 6 - And this old stand will most assuredly be gone!
|
The biggest challenge was trying to figure out the working height, operator positions, and space needed for the Rikon 6 inch x 48 inch Belt/10 inch Disc Sander that I have not yet ordered. The specifications provided some clues, the pictures in the downloadable instruction manual provided more. With some old cardboard boxes, a knife, and some tape, I mocked up a model of the combo sander and used that to help determine critical measurements. The whole process and more is covered in this month's video presentation. Click here to watch.
The entire project will require three sheets of 3/4-inch furniture grade plywood, one sheet of 1/2-inch (for the drawers), and one sheet of 1/4" tempered hardboard (for the drawer bottoms). I know that some people design projects in order to obtain maximum utilization of each sheet of plywood, but I do not. The fact is, the plywood these days is so lousy, there is a lot of waste anyway. And saving one sheet of plywood seems to represent a false economy if I compromise the design elsewhere.
The project will also require four 16-inch and three 24-inch over-extension drawer slides, lumber for edge trim and drawer fronts, four locking swiveling casters, some drawer pulls, glue, and laminate material to cover the top. I will likely need a few dust hose fittings and perhaps some electrical supplies, too.
The basic plywood construction will be all dado joints and glue. The last shop cabinet I made incorporated a rabbeted lock joint for the drawer corners. This time I plan to make box joints, just for a change of pace. I will make these on the router table and try desperately not to blow out the plywood or splinter it into oblivion.
I don't draw much, largely due to impatience, ineptitude, and perhaps a dollop of laziness, but this time I made three drawings, mostly in order to get the cutting and assembly sequence square in my head and to work out the drawer sizes. The first drawing is an overhead view without the top, looking down on the vertical frame members.
The second drawing is from the "front," which isn't really the front at all, but neither is it the back! It is actually a view from one side, adjacent to the end of the sanding center that will hold the combination belt/disc sander. This view shows the three large storage drawers.
The third drawing is a view from the operator position for the oscillating spindle sander. This view shows the four drawers in the "end" of the cabinet. Clicking on any of these three drawings will allow you to download a PDF containing all three pages.
Next month we will go through the basic cutting and joinery steps and the making of the box-joint drawers. In the interim I will try to produce a "cut-list" for the plywood pieces. Perhaps by next month I will have actually ordered the sander, too!
(Page 2 of 5)
Previous Page
1
2
3
4
5
Next Page
Return to Wood News front page
