by Steven D. Johnson
Racine, Wisconsin
(Page 4 of 4)
Previous Page
1
2
3
4
Goodbye Garage Door – Hello Wall!
|
|
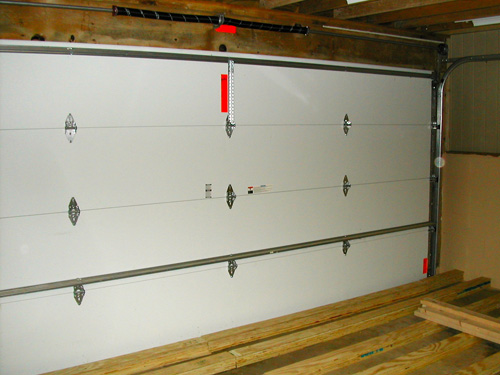
Figure 8 - Garage door, ready to disassemble...Scary!
|
If you are like most woodworkers and handypeople, you have occasionally faced a perplexing
challenge..."How can I make that joint, how can I mount that drawer, or how should I attach that
tabletop?" You think about it, worry about it, play it over and over in your mind and think of
every possibility, every nuance, every detail. Then, when you finally dive in and do, you find it
goes more smoothly, more elegantly, and more efficiently than you imagined.
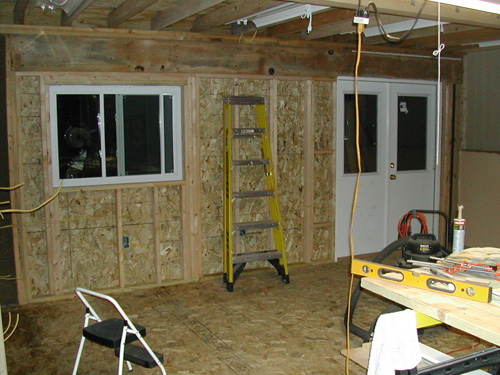
Tearing out the garage door with all its attendant hardware and trim, and building a wall with a
big window and door in its place was like that in the Down To Earth Woodworking Shop. What would I
find when the siding was removed? Exactly how heavy is a 16-foot garage door? Could I do that by
myself? Would the big garage door spring kill me when I tried to remove it? Why was there an
off-center support column under the garage door header? Would the whole garage fall down when I
removed it? How would I make sure the new wall lined up with the existing wall? Would the siding
match? Could I get the window and the glass in the new door to line up and look right? I couldn’t
finish this job in a day, how would I keep out bugs and other critters? What if it rains? Did I
have enough materials?
No matter what other project I was working on, my thoughts were constantly pulled to that garage
door. Early in the mornings with my first cup of coffee, I would stare at the garage door and think
through the steps...rehearse everything in my mind.
The day finally came to tackle the project. I started by removing the siding from the front of
the garage and stripping away the aluminum flashing from the garage door trim. Then I removed the
weather seal stop around the door.
The door was raised to its highest position and clamped in place. Using a nut driver bit in my
portable drill, I removed the hex head screws connecting the garage door panel hinges to the
uppermost panel. With great trepidation, I skewed the panel enough in its track that one roller
dropped out, and I was able to lower the end of that panel to the floor. Carefully I moved to the
other end and removed it from the track. So far, so good. Even though this was a good garage door,
metal on both sides and insulated, each panel was within my muscle capability. The second and third
panels went smoothly as well, but the last panel had the spring cables attached and rollers on both
the top and the bottom of the panel. Skewing the panel in the track to remove it would not be
possible.

|
Figure 9 - That pesky column...would the whole garage
fall when I removed it?
|
The spring cables scared me. I have heard and read so many horror stories about the dangers and
injuries resulting from garage door springs. I thought about simply cutting through the cable with
a pair of bolt cutters, but I had hoped to donate this quality door to Habitat or some other worthy
cause. So, with shaking hands, goggles, a face shield, and a pair of leather gloves, I grabbed the
cable with a pair of pliers and twisted it off its mounting post. It pulled...snapped, actually...but
because the door was in its highest position, most of the tension was off the spring. That drama
over, it was time for another coffee break.
Removing the 4-wheeled final panel was challenging. Ultimately, the easiest way for me was to
reverse the bolt and nut at the rear mounting brackets of the track, which allowed the door to roll
off the top of the track. When the top two wheels cleared the track, the panel hung down where I
could grab it and skew it out of the track the way I had removed the other panels.
With the garage door removed, the next step was to attach a pressure treated bottom wall plate to
the concrete for the new wall. Unfortunately, that pesky support column was right in the middle of
the spot where the plate needed to go. I could have built around the column, letting two partial
walls support the garage door header, but I wanted the plate to be as long and as contiguous as
possible to keep out water and insects.
|
Figure 10 - One of two temporary supports still
in place as the wall is being built.
|
Building a temporary "bridge support" turned out to be the answer. I doubled up some 2 X 6
temporary headers, then wedged them under the garage door header with 2 X 4 stilts on either side
(see photo). It looked good. It looked tight. It scared me. Time for another cup of coffee.
Caffeine buzzing, I finally threw caution to the wind and with a small sledgehammer, knocked the
bottom of the support column free. The garage didn’t fall down.
I cut the 2 X 6 pressure treated plates to length and used heavy duty construction adhesive and
those nifty explosive nails that fire through the wood and into the concrete for a fast, tight,
permanent attachment, using a snapped chalk line as my layout guide.
The walls were partially assembled on the floor. Then, after knocking them into place, square
and tight, I toenailed additional studs into place and started framing for the window and door. By
this time daylight and my energy was flagging, so I finished up the day by stapling a thick black
plastic covering over the entire front of the garage. Critters and bugs, heed the warning!
Day two, the balance of the wall framing went smoothly, as did the attachment of ½" OSB sheathing
to the outside wall. With that done, I had an additional inch of thickness to make up. The
original garage was built with ½ inch Homasote sheathing, then wood siding. Later, there was a thin
layer of sheet foam added and vinyl siding was installed over the original wood siding...about an
inch additional thickness, total.
I used 1-inch thick Styrofoam insulation panels to cover the OSB and make up the additional
thickness. This worked out extremely well, and the additional insulation will be particularly
welcome on this, the side facing the prevailing winter wind.
After building the wall up to proper (and matching) thickness, the window and door could be
installed. The window I could handle, but I had to enlist a neighbor’s help with the 60-inch wide
double door. His ten minutes of assistance was absolutely invaluable.
All in all, the project went smoothly in spite of, or perhaps because of, my obsessive fretting
over the plan and the details. A video of the wall building process is available on the Highland
Woodworking YouTube site (click
here to view). Next month be sure to watch for this column and a complete tour of the new Down To
Earth Woodworking Shop.
(Page 4 of 4)
Previous Page
1
2
3
4
Return to Wood News front page