 by Steven D. Johnson
Racine, Wisconsin
(Page 2 of 3)
Previous Page
1
2
3
Next Page
Pegboard Racks and French Cleats – So DéModé!
|
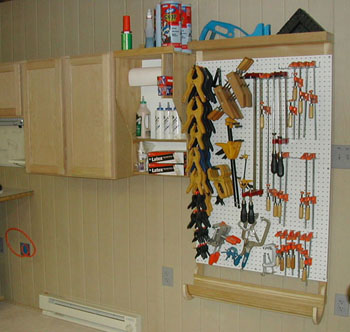
Figure 5 - Pegboard is quick, cheap, and tools can be
easily repositioned to suit your changing needs.
|
Pegboard is the poor cousin and a bit démodé in the tool storage world, but I like it. I
consider it the "shabby chic" of tool storage. It is quick, cheap, and items stored on pegboard can
be quickly repositioned. Woodworkers eventually build dedicated and often glorious storage systems
for their tools and someday I may, too. But for now, just to get organized, some pegboard racks I
had, and a couple of new ones, hang from French cleats and are helping the Down To Earth workshop
get back in business.
Again, I mentioned French cleats, as I have in previous articles and videos. Often, readers
e-mail me and ask, "What exactly is a French cleat?" Deceptively clever, elegantly simple, and
sturdy as all get-out is what it is; simply, it is two opposing angles that when mated, provide a
strong, but not necessarily permanent, way to affix shelves, cabinets, and other things to
walls.
|
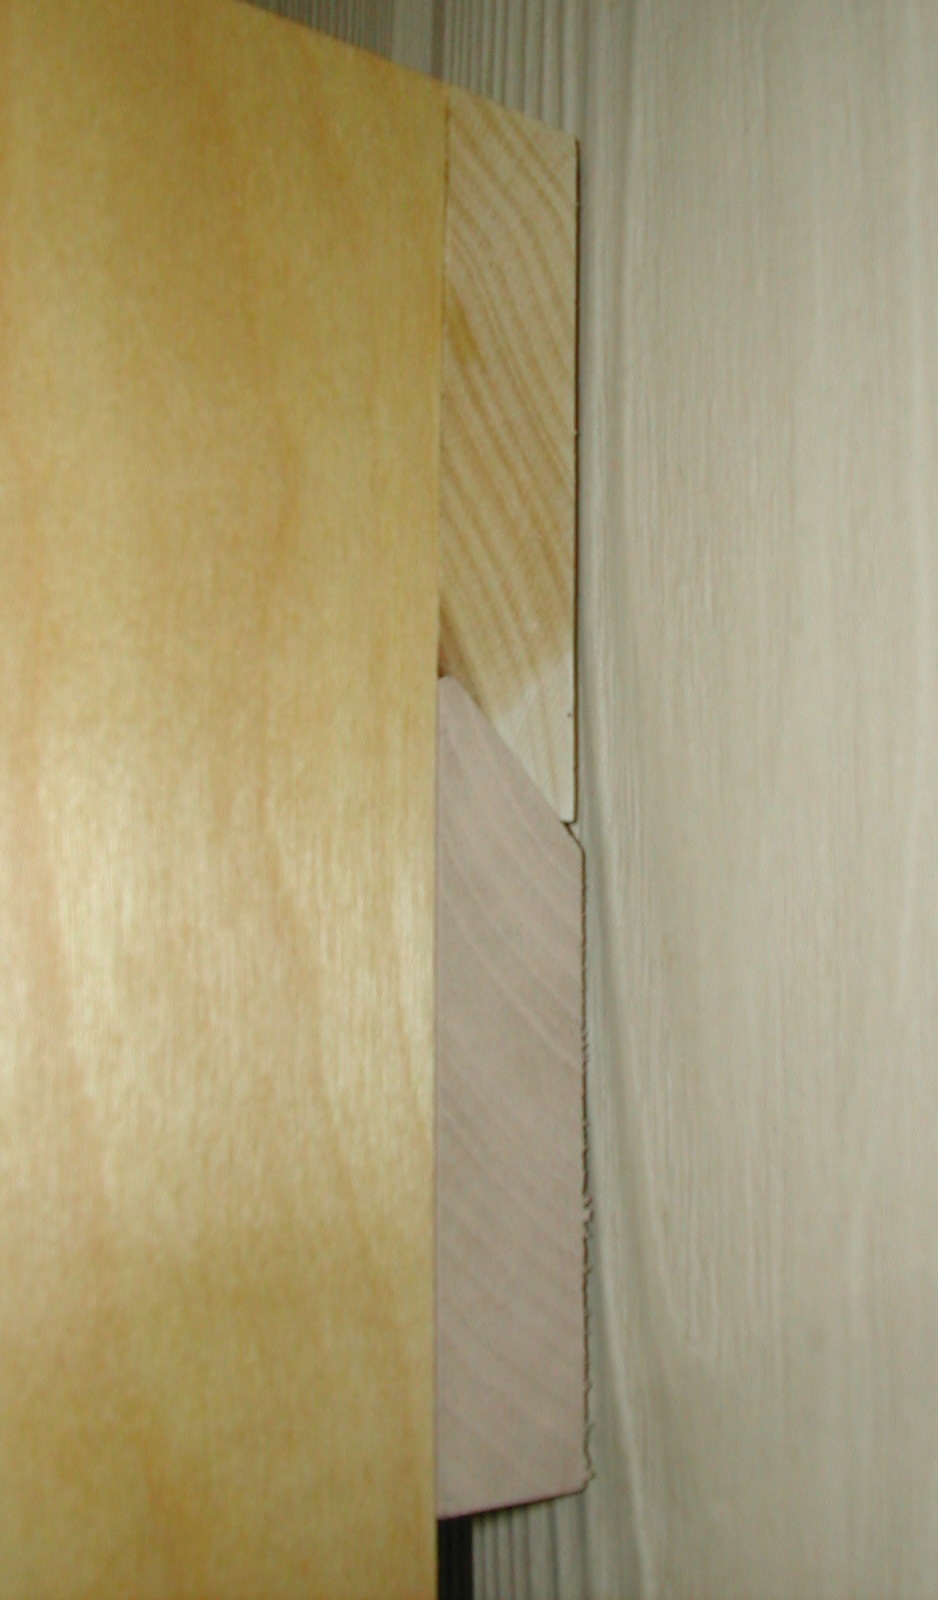
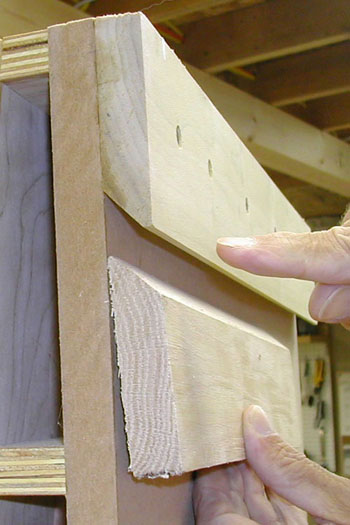
Figure 6 - The French cleat on the back
of my shooting board. Notice the small
"flat" milled on the edges of the points.
|
Making a French cleat system is easy. Just rip the edge of two boards at 45 degrees, mount one
to the wall with the pointy side up and away from the wall. Mount the mating piece on whatever you
want to hang, say a cabinet, pointy side down, and away from the cabinet. Then, when you lift the
cabinet up and place the cleat over its matching partner, gravity will draw the two together and
hold the item firmly to the wall.
In practice, there are a few tips to remember. After cutting the 45-degree angle, I usually rip
off a smidgen of the point, making a small "flat" on the pointy side. This allows the cleat to seat
completely, even if there is dust in the channel or if the wall cleat is slightly out of alignment
(either in the horizontal or vertical plane, but more often due to a "wavy" wall).
|
|
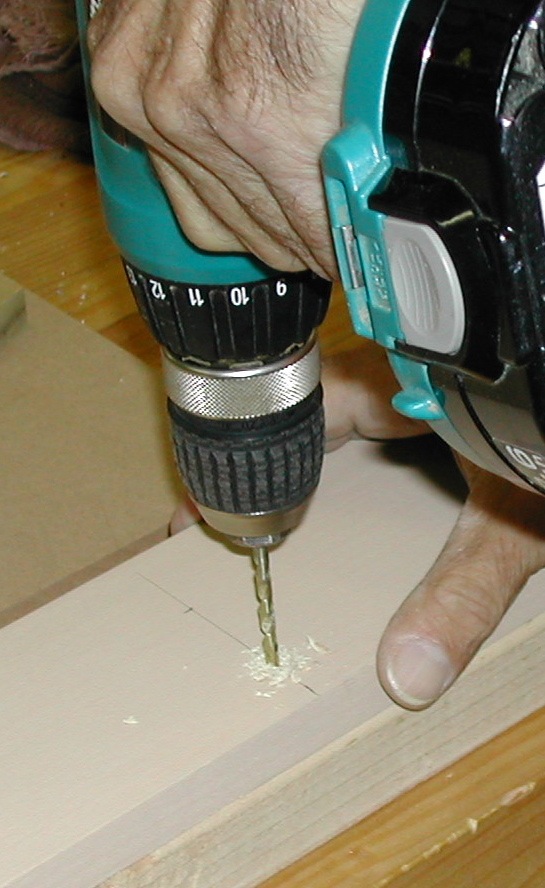
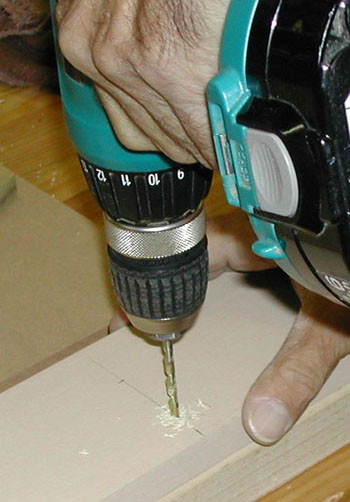
Figure 7 - Drill clearance holes
for the screws...
|
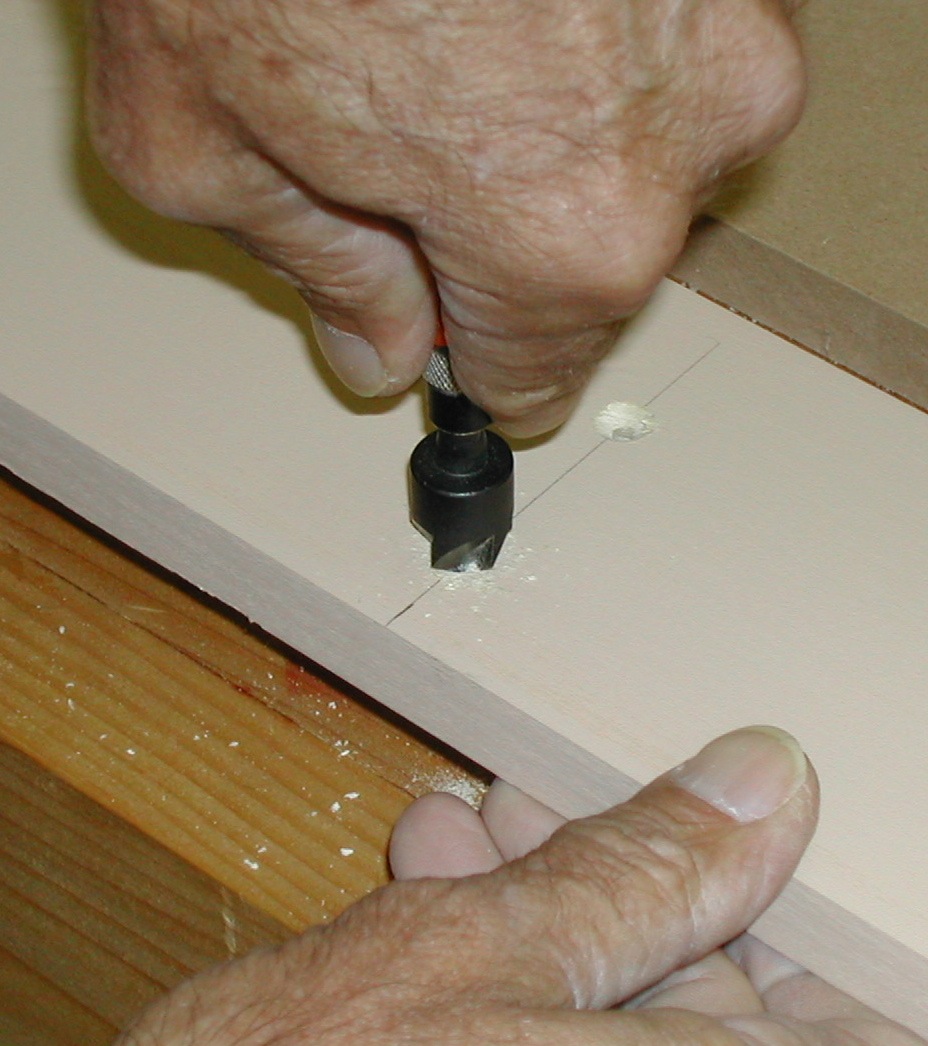
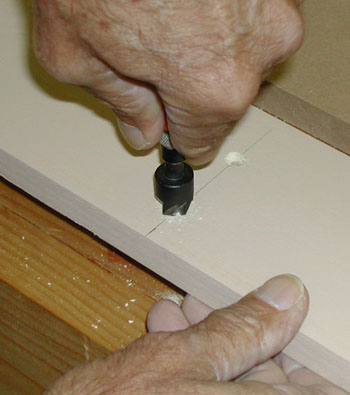
Figure 8 - ..and countersink for
the screw heads.
|
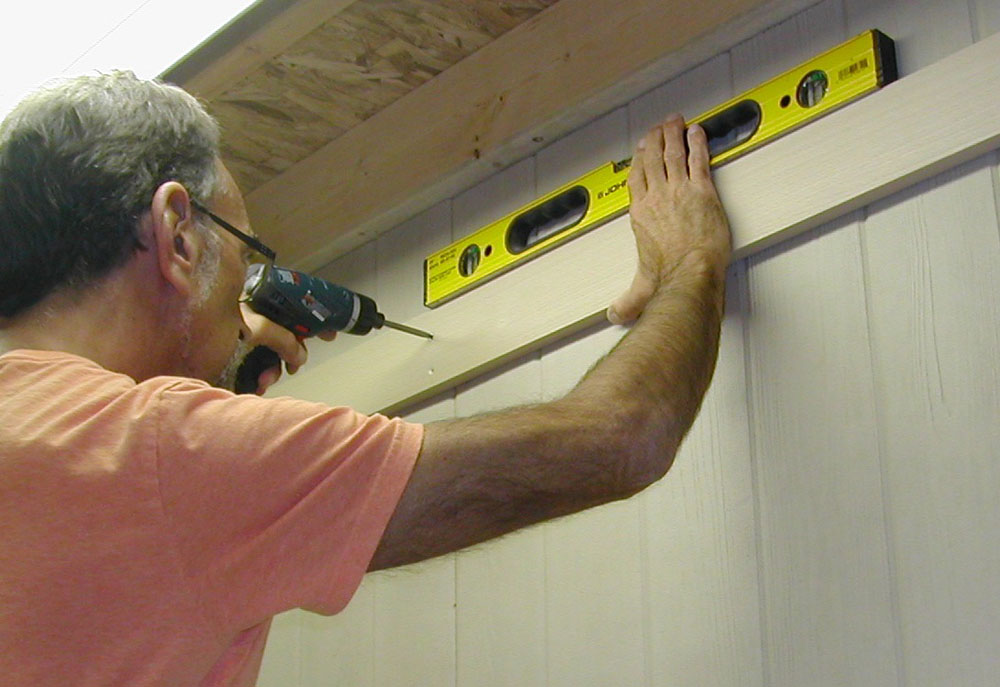
The mechanical connection of the cleat to both the wall and the item to be hung is important. I
use beefy wood screws to attach the cleats to the wall, and not to overstate the glaringly obvious,
those screws should go into studs.
You will be much happier if you predrill clearance holes for the fasteners. When driving big
honking screws into the wall, holding up a long board and trying to get everything level, the
pre-drilled holes make life easier. Also, be sure to countersink the holes so that the screw heads
do not stick up higher than the wood. I use a
hand countersink
for this
task. It's fast, easy, and infinitely more accurate than using an electric drill. The edges of the
countersink are smooth and splinter-free, too, with this tool.
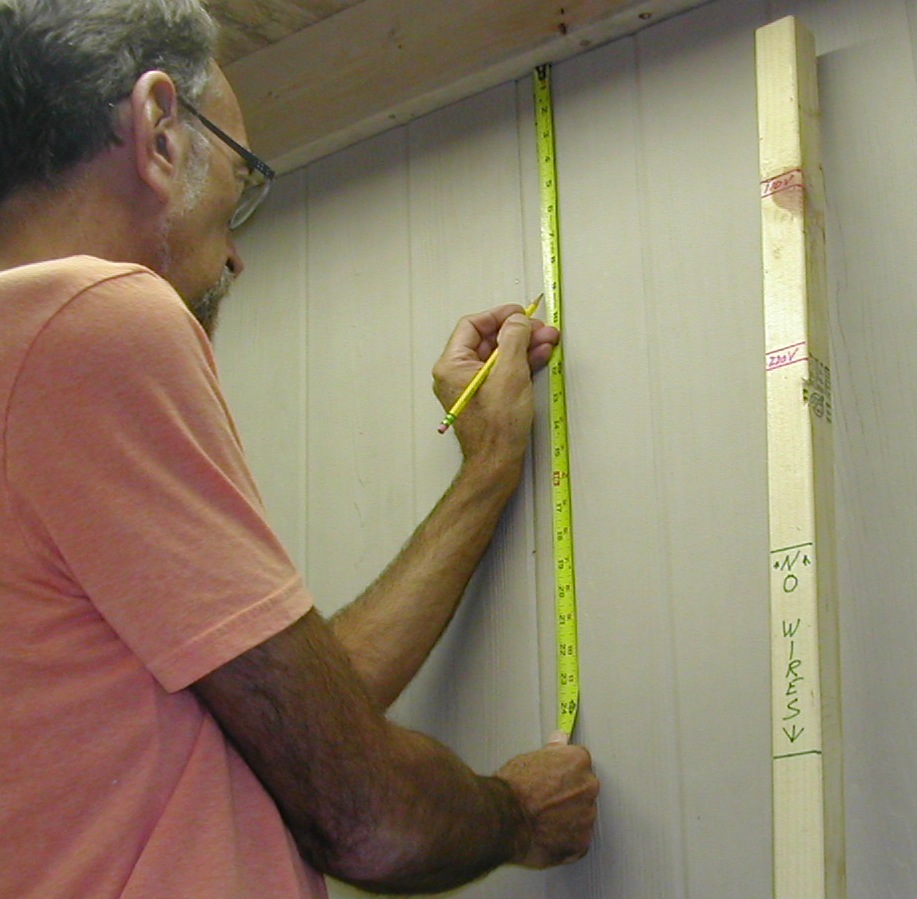
When deciding where to mount the wall portion of the French cleat system, make sure to leave
enough space above for the lift-over...in other words, make sure you can get the cabinet up and over
the cleat so it can drop down and interlock. Watch for wires in the walls, too, since you will
probably be using rather long screws. I pulled out the story stick I used when running the rough
wiring and knew exactly where not to drill.
I usually just mark a spot to align the bottom of the cleat, then use a level while driving the
screws. It is a three-handed job, usually while on a ladder, so be careful.
|
|
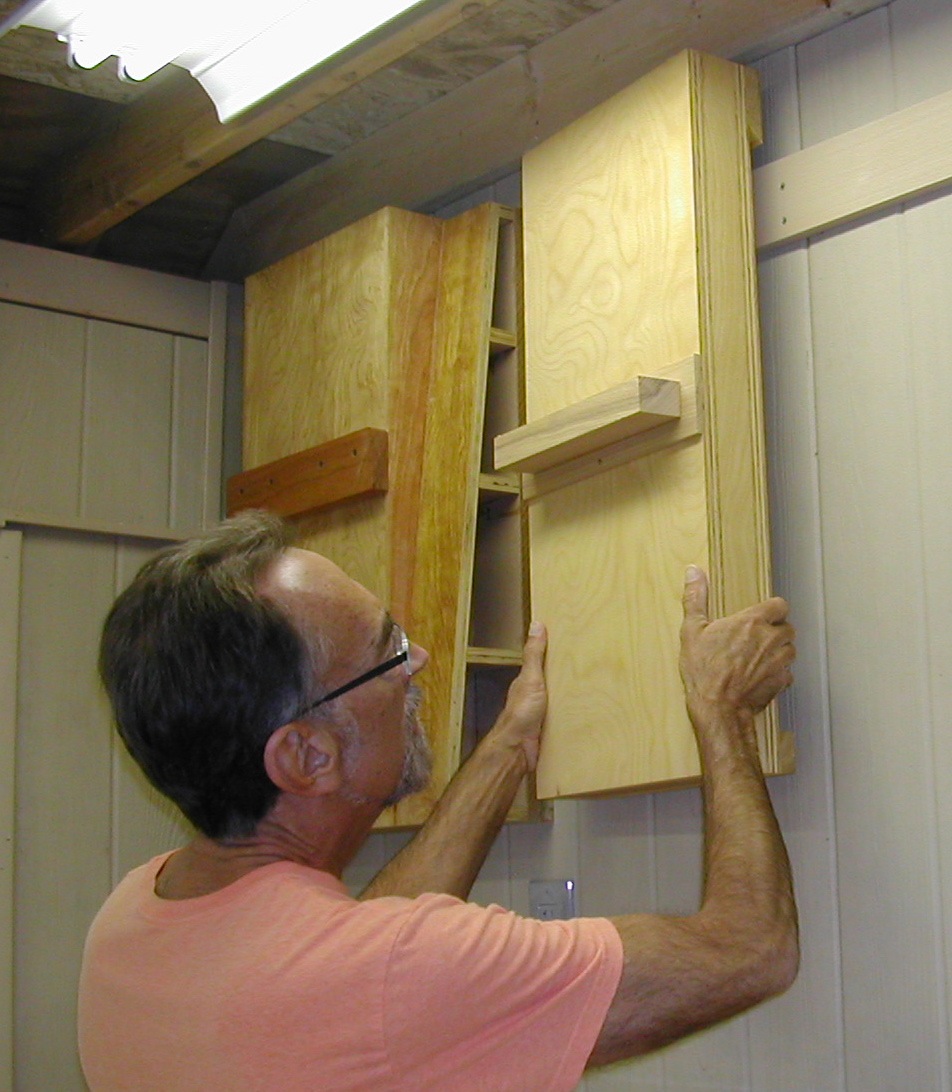
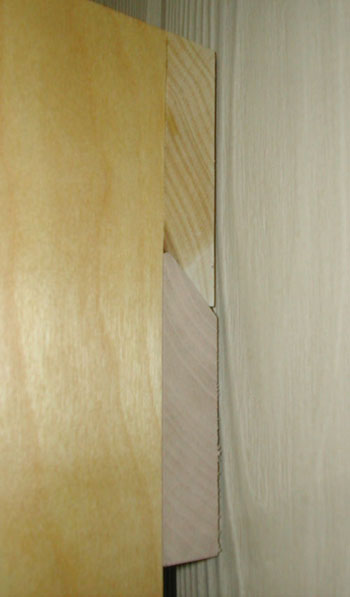
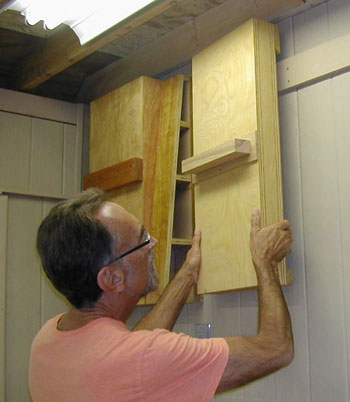
Figure 9 - Simple, strong, easy...
the French, uhh, pinch cleat in action.
|
Figure 10 - Note the "lift-over" area and make
sure to allow for it.
|
Attaching the French cleat to the back of a cabinet, clamp rack, or pegboard panel is easy. You
can incorporate it into the design or attach it after the item is built. Just remember that a good
mechanical connection along with fasteners and glue is not necessarily overkill. A rack full of
clamps, for instance, can weigh several hundred pounds. Also remember to mount a same-thickness
standoff at the bottom of the cabinet or rack so that the unit hangs straight on the wall. The
standoff does not support any weight, so I have used scraps the same thickness as the French cleats
and simply glued them in the bottom corners. On pegboard racks, I generally run the standoff the
full width as it provides additional resistance against racking.
Okay, okay, I must finally admit, after being asked countless times, I do not know why they are
called "French" cleats. The word cleat is actually of German origin. Klaut, or a "firm lump" was a
wedge of wood bolted to a spar to keep it from slipping. Perhaps with the legendary French
proclivity for love and romance, people saw two mating cleats and dubbed them "French." Please, no
letters about this one! I've heard the system called a "pinch cleat" and I think it may be time to
officially change the name.
(Page 2 of 3)
Previous Page
1
2
3
Next Page
Return to
Wood News
front page