 by Steven D. Johnson
Racine, Wisconsin
(Page 3 of 3)
Previous Page
1
2
3
One-Day Shop Super Cleaning

|
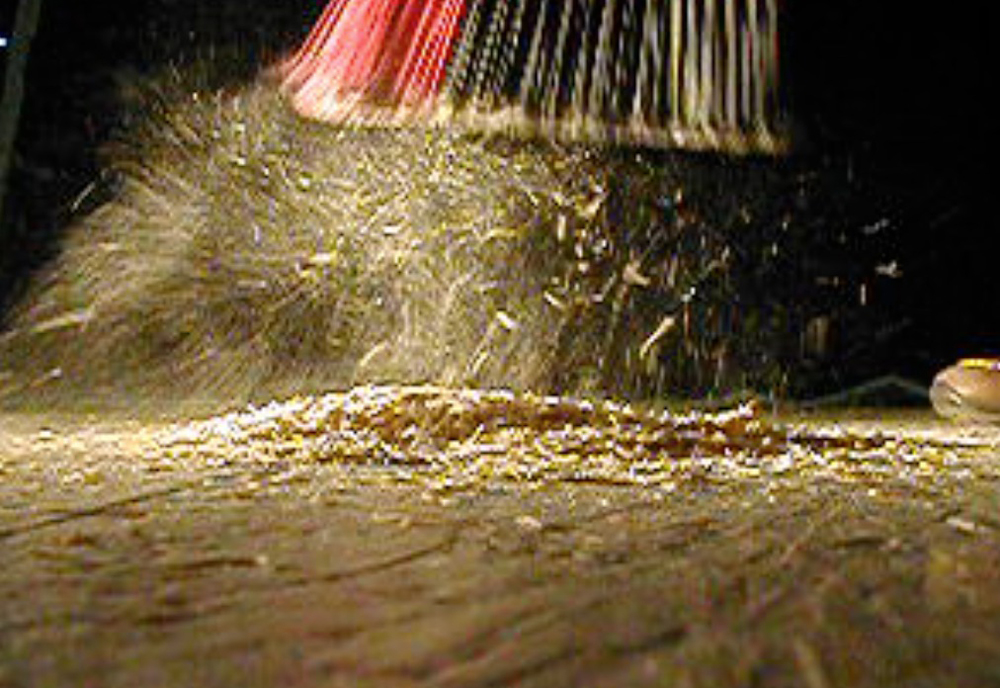
Figure 3: Low light and a slow shutter speed
shows just how much dust is stirred up
when you
sweep with a broom.
|
Gross.
What a great word. It has many meanings as an adjective, a noun, a verb, and even a verb phrase. As an adjective alone, there are a dozen subtleties to its meaning, and speaking of dozen, a dozen dozen, or 144, is a gross of anything. "It was so-o-o-o gross, he ate like a gross of donuts and then got grossly ill."
In the context of cleaning your shop, it's best to start with the gross. No, not the detritus of last week's sandwich or the ant-covered cookie crumbs, which would be gross, but the large chips, splinters, and flakes of wood that are scattered about a busy shop, on the floor, under tools, and in crevices.
|
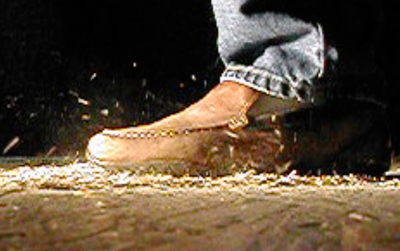
Figure 4: Every step stirs up little
whirlwinds of air and dust.
|
When cleaning almost anything, it is best to start at the top, but doing a quick pickup of the gross, meaning "larger," stuff before you start cleaning in earnest is a good idea. And while it is fast and relatively effortless, leave the broom outside. Sweeping up wood chips stirs up a cloud of dust, which resettles on everything. Even walking through the woodchips stirs up little air currents and eddies of dust that drift about. Use your shop vacuum or dust collector and suck up the big stuff.
When the really gross stuff is gone, it's time to start the serious cleaning...in detail. I promised a one-day (or less) cleaning strategy and a brighter, more pleasant shop. So here we go...
You will need only a handful of supplies and tools for a thorough cleaning job. A shop vacuum with a fine particulate bag filter is a must. There are bags available for almost any brand of vacuum, so get a couple. The bag combined with the filter in your vacuum will pick up and hold the dust and allow you to dispose of it properly. Assemble the usual shop vacuum tools...the hose, crevice tool, a floor attachment, and the little brush attachment. You will also need a roll of paper towels, some window cleaner, a micro-fiber cloth, and a dust mask.

|
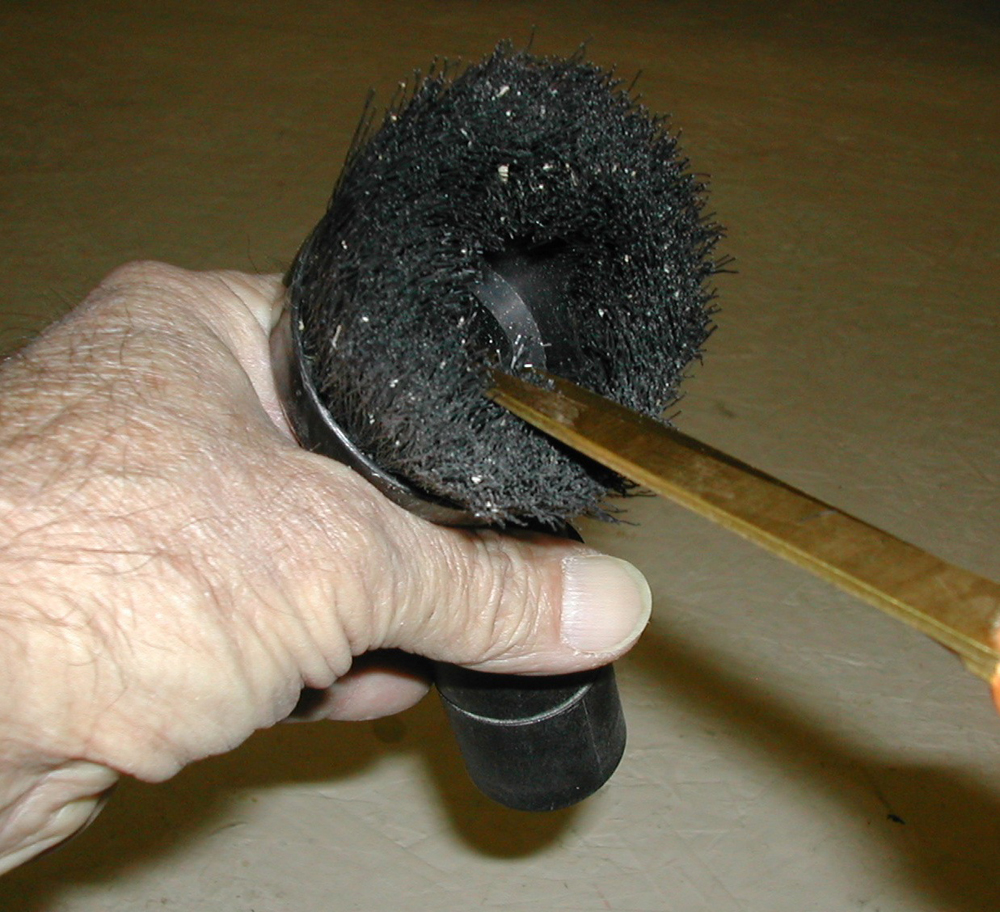
Figure 5: Trim the bristles from the center
of the brush to make it more effective.
|
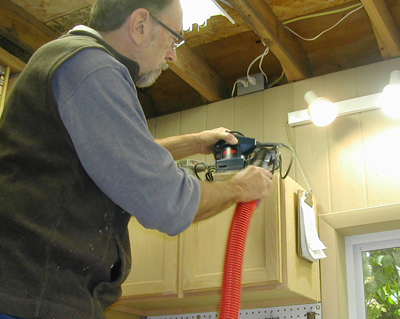
The brush attachment for your shop vacuum is going to be the most-used tool. I like to start by using a pair of scissors to trim out the bristles around the inside circumference of the brush. It will be just as effective and will clog up much less. This whirlwind cleaning exercise is going to stir up a lot of dust, so don a mask and let's get going. And, by the way, if you have an air filtration unit in the shop, turn it on and let it run the whole time you are cleaning.
|
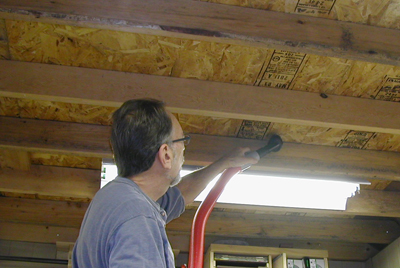
Figure 6: In my shop the ceiling is the floor
above – whatever your ceiling is, vacuum it all.
|
Start at the top. With a step stool or ladder, start vacuuming the ceiling, joists, rafter ties, or whatever makes up the top of your shop. The little vacuum brush is the tool for this. The very act of rubbing it along every surface will dislodge a lot of dust...some will get sucked into the vacuum; the rest will fall to the floor. We'll get to that later. Stop every few minutes, remove the brush, and vacuum off the bristles...you'll be surprised what is stuck to them.
This part of the cleaning regimen is tedious, but if you make a game of it, it will go faster. Try vacuuming to the rhythm of a favorite tune or work out a mental vacuuming pattern (think of a checkerboard or the strategy you use to mow the lawn) but don't jump around without a set pattern. Any spots you miss will eventually rain dust on you during the next earthquake or when someone slams the door.

|

|
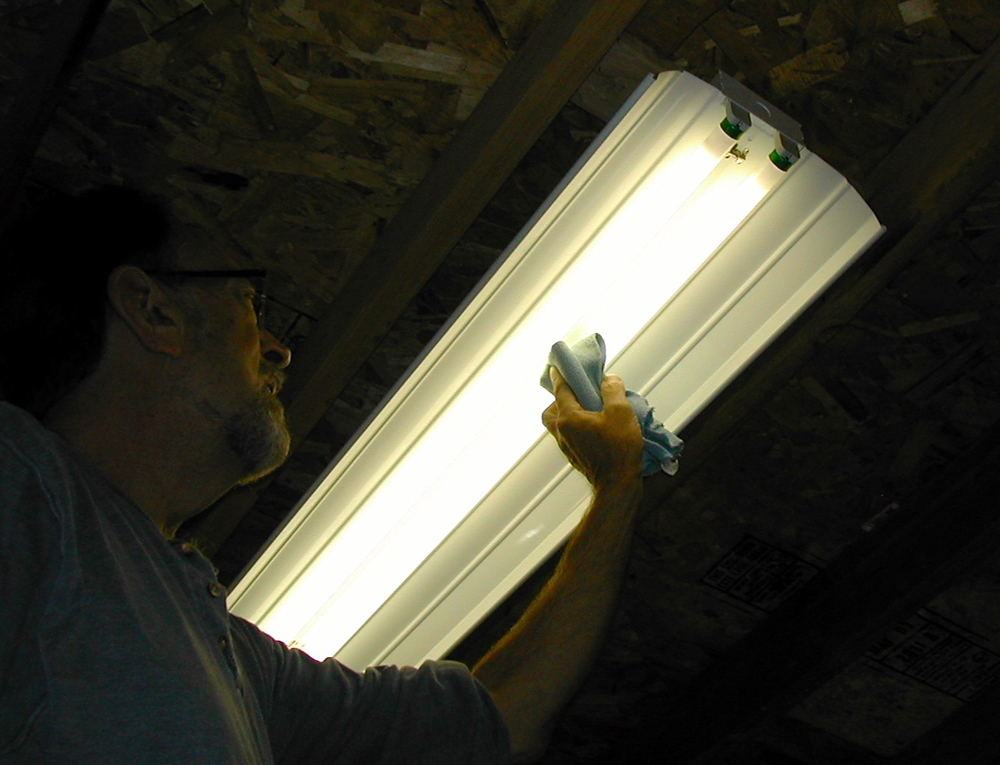
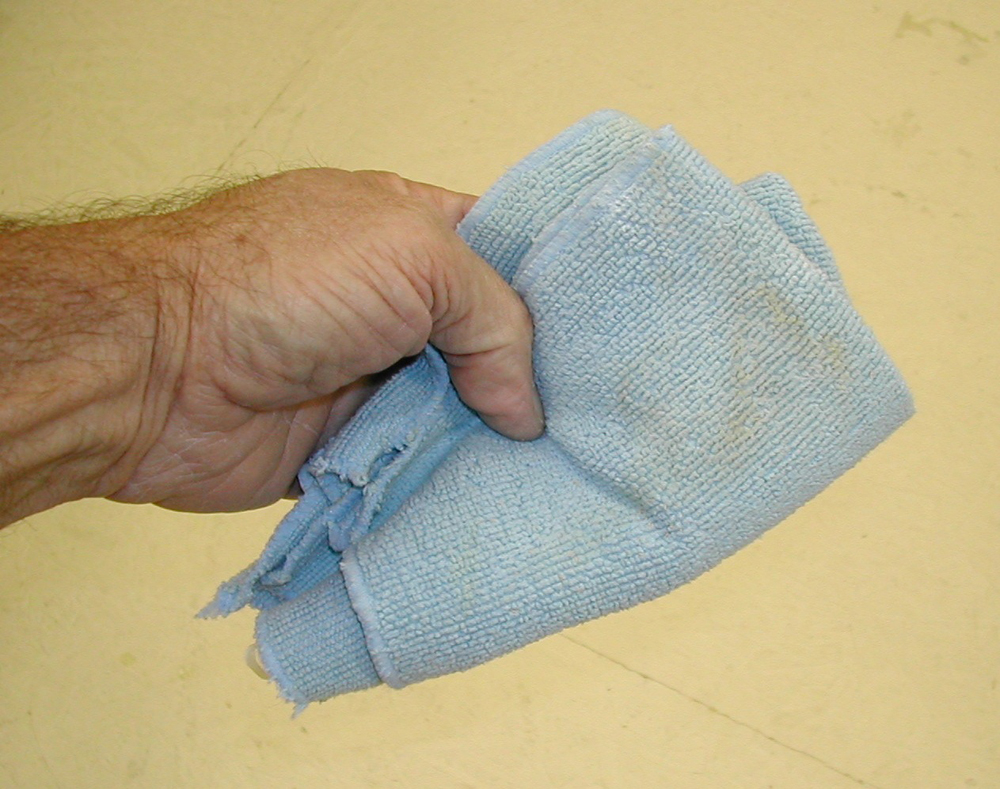
Figure 7: Fluorescent lights can be
cleaned easily with a microfiber cloth.
|
Figure 8: All that dust on the bulbs
was cutting down on the light output.
|
There is a strong temptation to clean everything in a spot while in the spot...resist this temptation. Clean the ceiling first, even if you are tempted to go ahead and clean the lights while "in the area." Only after vacuuming every square inch of ceiling, go back and clean the lights and fixtures. Fluorescent lights are easy. The bulbs are cool, so just wipe them lightly with a microfiber cloth. You will be amazed how much dust comes off these critters, and how much brighter your shop will be. Incandescent lights will be hot, and the dust will be firmly attached...baked on, literally. Let the bulbs cool, remove them, and clean with a cloth misted with window cleaner or water mixed with a drop of dishwashing detergent. Dry them thoroughly before reinstalling. Be sure to wipe off the threaded base of bulbs.
If your shop size is average for most hobbyists, you will probably have an hour to an hour and a half of work getting the ceiling and lights clean. Already the shop is brighter, right? Now for the hard part...
|
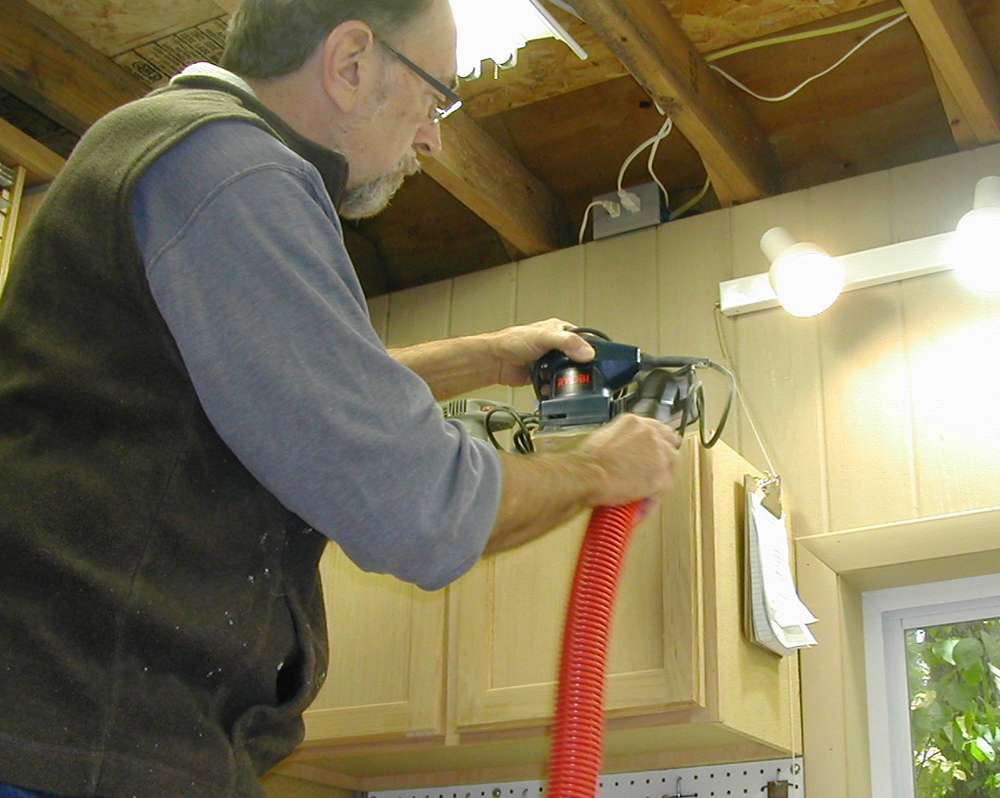
Figure 9: With the vacuum and brush, clean in,
around, and under everything.
|
We woodworkers love to cover our walls with stuff. Cabinets, of course...shelves, of course...but we also hang saws, jigs, templates, blades, rulers, and all matter of other shop paraphernalia from our shop walls. And don't forget the posters, pictures, and plans thumb-nailed to any open spot; the clock, the thermometer, and the shopping list are up on the walls, too; and of course the speakers, the television, and the license plate from your first car. It's all up there, on the wall...and it all needs to be cleaned along with the wall behind.
I know it is a daunting task, but work methodically and it goes fast. I started on one wall with the vacuum and brush attachment, and worked my way down all the way to the floor. The tops of my wall-hung cabinets are loaded with handheld power tools. Each one got picked up, vacuumed off, and then the space under it vacuumed thoroughly. The top edges and fronts of the cabinet doors got vacuumed. Under the cabinets, a couple of small sections of pegboard also got vacuumed. Oops, I sucked up some rubber bands hanging from a peg hook, but it was a small price to pay for cleanliness.
|
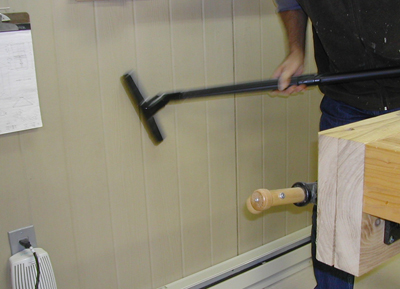
Figure 10: Larger sections of the wall
can be vacuumed with the floor attachment.
|
For large open expanses of wall (if you have any) connect the floor brush to your shop vacuum and cover ground quickly. Use the crevice tool to get into any nooks and crannies. Vacuum around windows, the trim, and the tracks, too. My wall full of clamps hanging from clamp racks was the most difficult. Each clamp was cleaned and the wall space behind it. I found a couple of clamp pads that had slipped off and were deemed lost forever. What a nice surprise!
Papers, plans, pictures, and notes are easy. Remove the thumbtack or magnet holding them in place, shake the papers over the as yet un-re-vacuumed floor, and hang them back up. This is sort of mindless work, so think constructively during the process. Keep a mental list of the volume of dust on each tool hanging on the wall. Those with little or no dust are obviously being used a lot...those with large mounds of dust, not so much. Think about whether those tools could be moved, sold, or discarded, freeing up some valuable additional shop space.
Some of my dust is like an archaeological revelation. The layer of cherry dust was from a hutch a few months ago, the layer of walnut dust on top of that was from a dining table, then there is a layer of maple, another layer of walnut, and a final layer of ash from my most current project. Really? If there are five projects' worth of dust layers on something, it needs to go! I moved some tools to the upstairs storage area and threw away a lot of no-longer-applicable junk that was hanging about. I know I kept that visitor's guide from last year's woodworking show, but why?
Almost everything in my shop is on wheels, so everything got moved toward the center of the room, making it easy to vacuum the lower half of the walls. The most time-consuming part for me was under the stairway. I have all sorts of parts bins and other storage there, and there was a lot of detailed vacuuming.
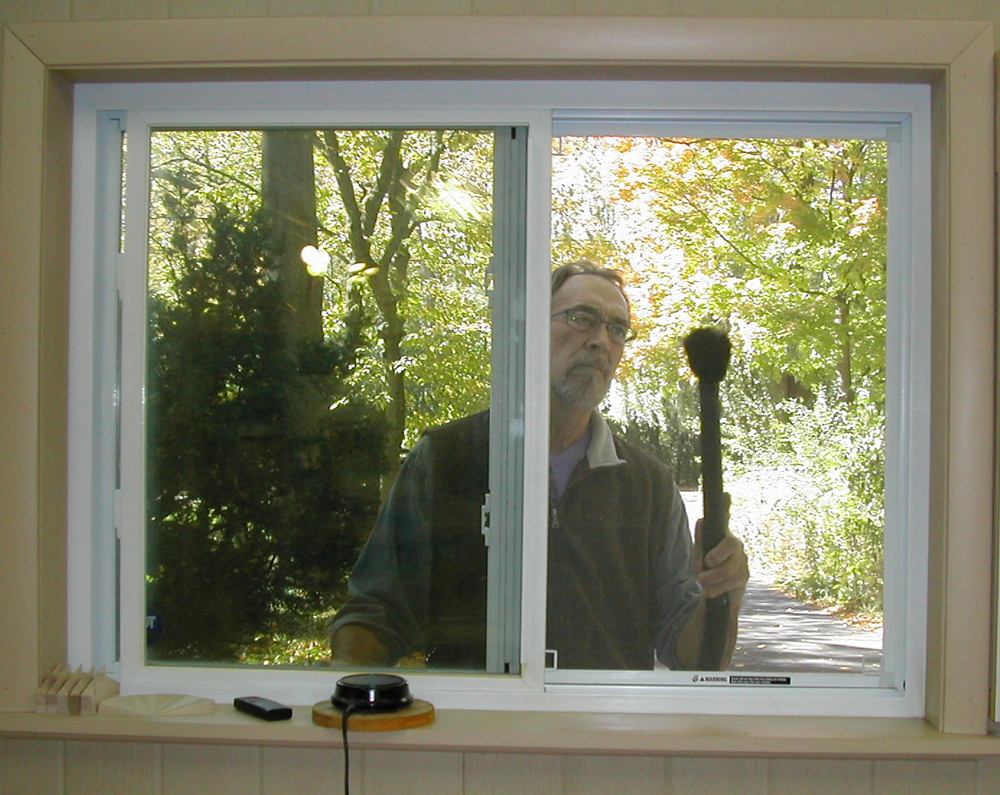
Again, it is tempting to do it at the same time, but hold off on the windows and doors until the walls are done. A different set of tools and supplies are needed. After a summer of blissful fresh air, the screens were covered in dust. I took another smaller shop vacuum outside and gently vacuumed all the screens. While out there, I cleaned the glass. Back inside, I vacuumed the screens from the inside and cleaned the glass there, too. Remember to vacuum the window mechanisms, tracks, latches, etc.
Doors follow a similar procedure. Don't forget the tops of the doors...there might be a white glove test! I vacuumed around the weather stripping with a crevice tool and found much grit and grime and a couple of spiders hiding out. Hope they find something to eat inside the vacuum cleaner bag.
With the ceiling and walls and everything attached or hanging from those surfaces done, I was about four hours into the project. The only thing left to clean was equipment, furniture, fixtures, and floors. I went after the equipment first. After a quick once over with the vacuum brush attachment, the crevice tool got rid of stray bits of sawdust and woodchips quickly. I paid special attention to the undersides of the equipment. Spiders must like the challenge of building webs in a noisy, vibrating environment.
Some folks like to blow dust out of machine crevices, and that is a good technique – especially if you relish the idea of re-cleaning everything you just cleaned. If you want to use that technique, do it before cleaning the rest of the shop. The floating dust will just re-settle all over the place. Personally, I only want to move the dust and dirt once, so I would rather use the shop vacuum.
All my shop-built cabinets and fixtures got a thorough cleaning, too. The tops, the sides and backs, and even the pulls and knobs were vacuumed. The wheels under all my equipment and cabinetry seem to gather a lot of stubborn sawdust, and hitting those areas with an old toothbrush with the vacuum nozzle held close by got them spic and span.
With all the dust that fell from the ceilings and walls as I cleaned those surfaces, the floor was really ready for detailed vacuuming. At this point I was roughly 6 hours into the project, so it was way past time for a break. While enjoying a cup of coffee and a nosh, I realized I missed a couple of things. I vacuumed the stairs to the second floor before I ever started cleaning the shop, and I cleaned the space under the stairway, but I failed to clean the underside of the stairs. I also missed the television screen and the clear acrylic doors in a couple of cabinets. I seem to remember something potentially deleterious about vacuum cleaners and TV screens, so the microfiber cloth did a commendable job. Amazing how much dust was on the screen, probably due to the static electricity developed when in use. I love using acrylic instead of glass for clear door inserts in shop furniture, but cleaning it is a little trickier than glass. A paper towel can scratch, and some formulations of acrylic don't much like ammoniated cleaners. Some plain water mixed with a drop of dishwashing liquid on a soft shop towel worked wonders.
Satisfied that everything else was clean and the stirred up dust had settled or been sucked into my air cleaner, I started to vacuum the floor. Everyone has vacuumed before and giving advice might be redundant, but I'm going to anyway...Use the crevice attachment and go around the floor where it joins the walls first. Then switch to the floor attachment and get the periphery of the shop while the equipment is still moved away from the walls. Move the equipment and cabinetry back into place and work on the middle of the floor area. In short, work from the outside-in, not from the center-out.
There are just a couple of things left to do. Vacuum, wash, or otherwise clean the filters in the air cleaner, clean and empty the dust collection system, and put a new filter bag in the shop vacuum. Now you are really ready to get back to working the wood and making a mess all over again. But for a few precious moments, your shop will be clean, bright, and smelling fresh! Quick! Grab someone to see it! And remember, if you clean up a little after each session in the shop, you won't need to do the big detailed cleaning job again until Spring.
(Page 3 of 3)
Previous Page
1
2
3
Steven Johnson is retired from an almost 30-year career selling medical equipment and
supplies, and now enjoys improving his shop, his skills, and his designs on a full time basis
(although he says home improvement projects and furniture building have been hobbies for most of his
adult life).
Steven can be reached directly via email at
downtoearthwoodworks@me.com
.
Return to
Wood News
front page