 by Steven D. Johnson
Racine, Wisconsin
(Page 2 of 3)
Previous Page
1
2
3
Next Page
Sheet Sandpaper Organizer/Storage Unit
Click on any picture to see a larger version.
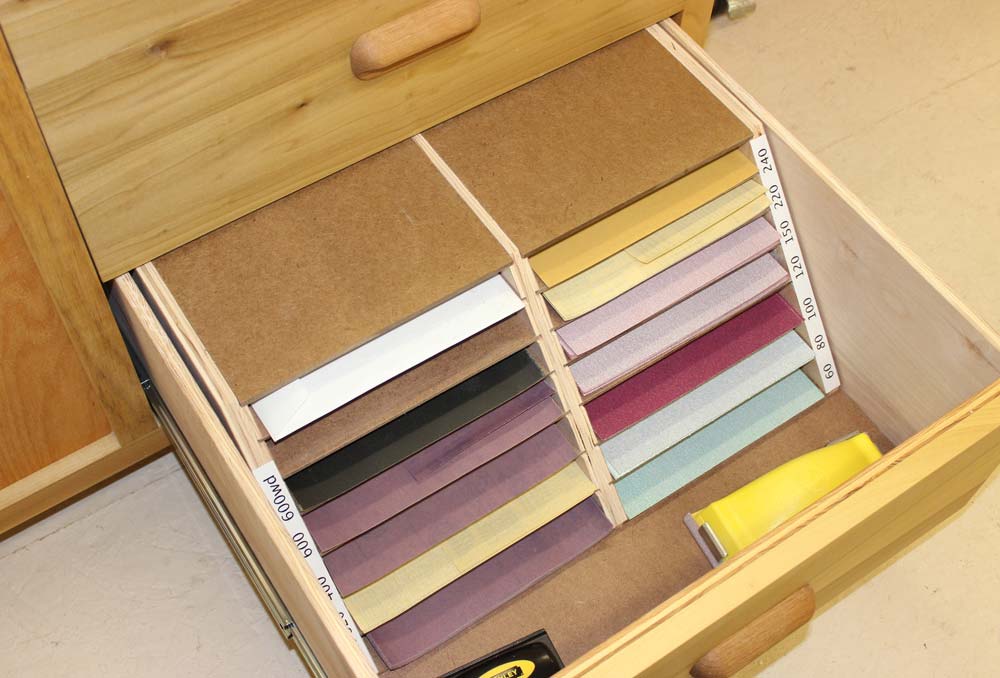
Sanding is plenty of fun without adding undue frustration… and it is sometimes stressful just trying to find the right grit of sandpaper or trying to read the grit from the back of a sheet. Why do they make those numbers hard to find and hard to read?

|
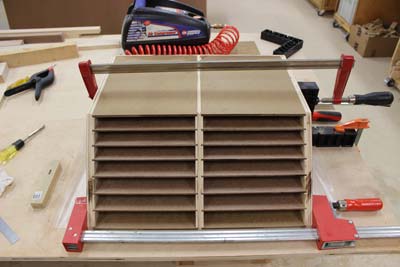
Figure 18 - With staggered slots for 14 different kinds of
sandpaper, this handy organizer saves time, space, and money
|
The mobile sanding center project afforded me the opportunity to get a little more efficient and this little add-on project helped me get more organized. The sandpaper sheet sorter/storage unit is designed to fit in one of the bottom drawers on the mobile sanding center, but you could place it on a shelf or hang it on the wall if you prefer. The design is versatile, easy to modify to suit your needs, and easy and fun to build.
Start by gathering up scraps (I'm on a mission to usefully use up all the scraps in my shop) of 3/4" plywood, some 3/16" hardboard (Masonite is a trademarked product), some 1/4" plywood or Masonite (you could even use an old piece of pegboard), about 5 feet of 3/4" wood at least a couple of inches wide (I used poplar), a 3/16" straight bit for your router, and some glue.
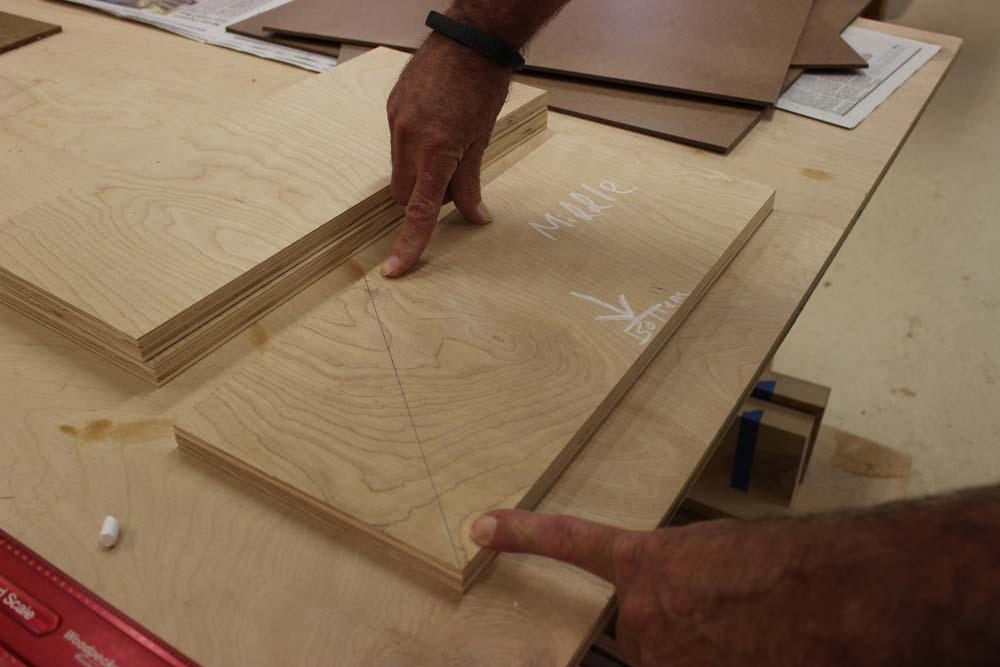
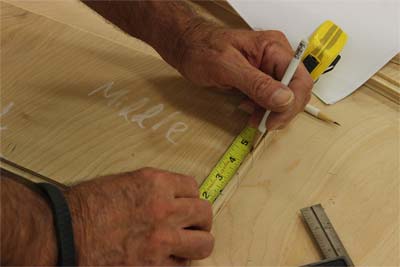
Rip the 3/4" plywood to 8" wide and cut three pieces 18-3/4" long. Mark one piece as the middle, and designate and mark one long edge as the bottom. On what is now the top edge, make a mark 11-1/2" from one end, then draw a line from that mark to the opposite corner. This will form a 42.5-degree angle.

|
|
Figure 19 - Marked middle piece...
note the orientation mark
|
Figure 20 - 1/4" wide X 3/16" deep rabbets
|
|
|
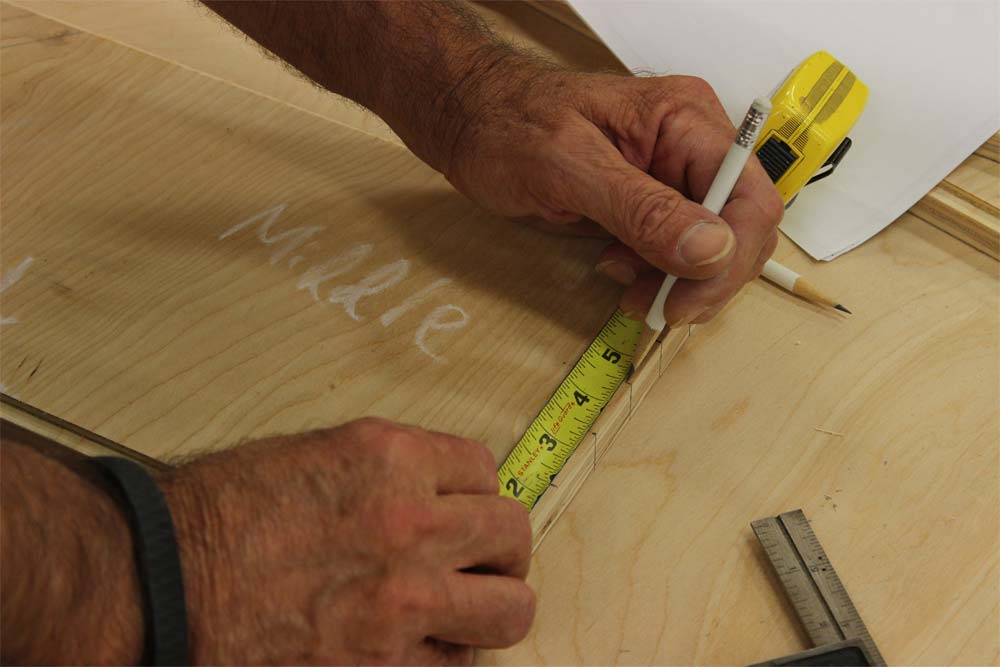
Figure 21 - Mark locations for grooves
|
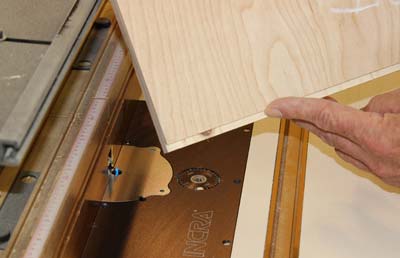
On the router table, set the 3/16" straight bit to cut 3/16" deep. Along the long edge of each piece of plywood, cut a 1/4" wide rabbet by making two passes. Label two of the pieces of plywood as "left end" and "right end." These will have rabbets on one face only, at the top and bottom. Label the third piece "middle" and cut the 1/4" rabbets on the long edge of both faces, top and bottom. Now using the middle piece, the one with rabbets cut on both sides, mark the 8" edge of the piece starting at the inside edge of the bottom rabbet. Make marks at 1-1/8", 2-1/4", 3-3/8", 4-1/2", 5-1/2" and 6-1/2". Use a square to extend the marks across the bottom edge of the board.
Set the fence on the router table so that the 3/16" bit is centered on the first mark and in one pass make a groove the entire length. Flip the middle piece over and make a matching groove on the other side. Then make a groove on the inside side of each of the end pieces. Be sure to start at the bottom. At this point the left and right boards have to stay in the correct orientation, so you may want to also label them "top" and "bottom," or "left" and "right." Move the fence to the next mark, cut the grooves, and continue until all the grooves are cut.
|

|
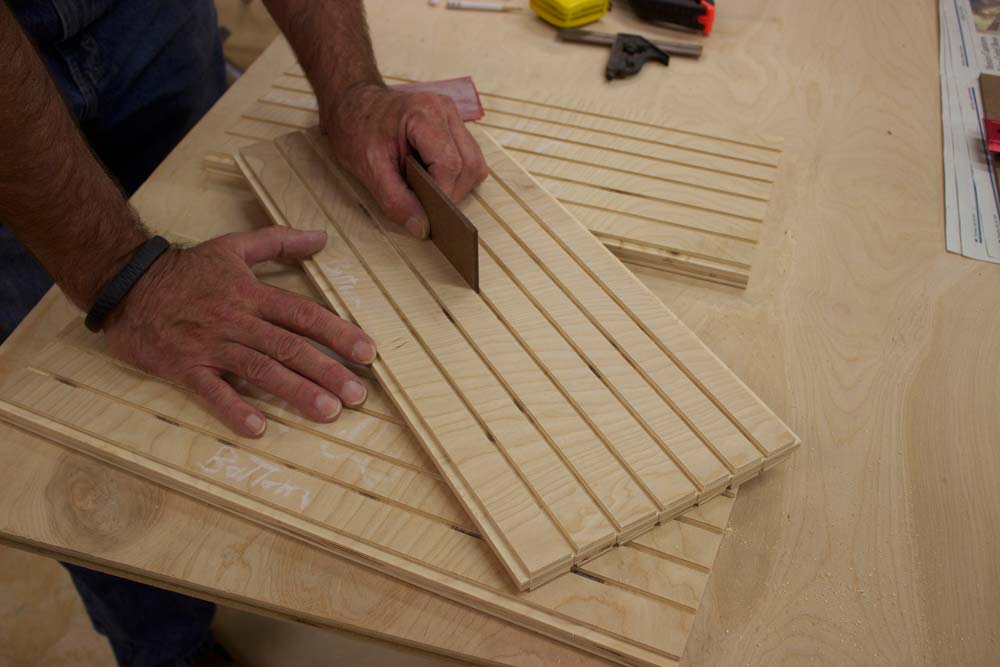
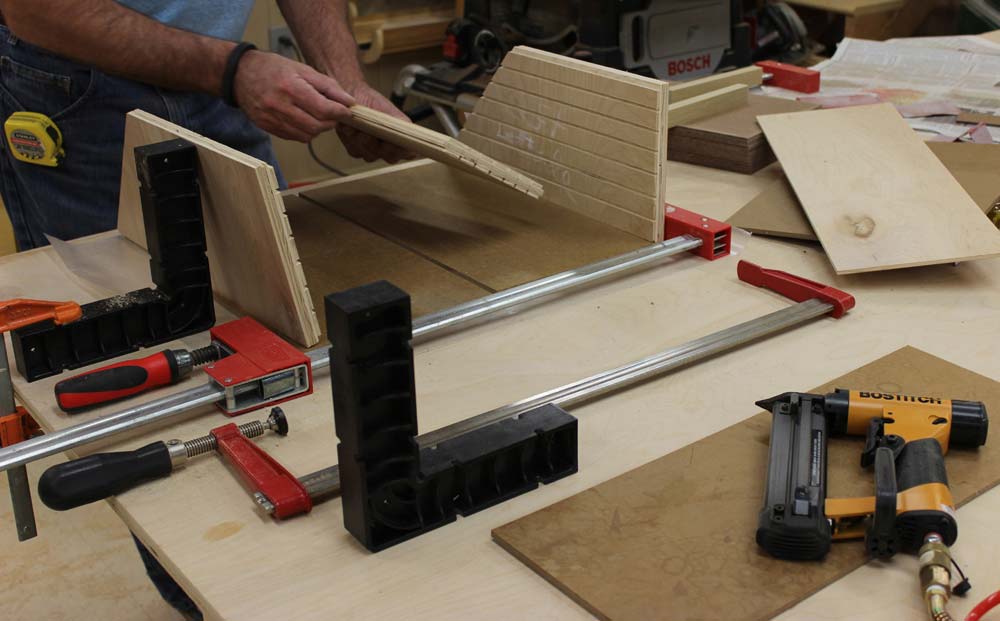
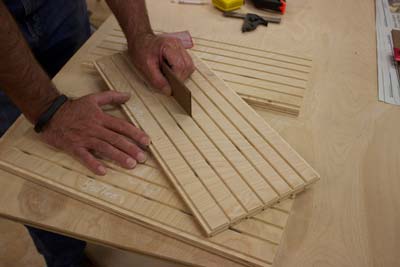
Figure 22 - Test fit each groove with a piece
of the hardboard...go for a semi-snug fit
|
Figure 23 - Set the angle carefully and use a
stop block to assure all three pieces are identical
|
After all the grooves are cut, sand off the "fuzzies" and use a piece of the 3/16" Masonite to test the fit of each and every groove. Aim for a just barely snug fit. The shelves will be slid into the unit after the top and bottom are glued on, so make sure they slide easily.

|
|
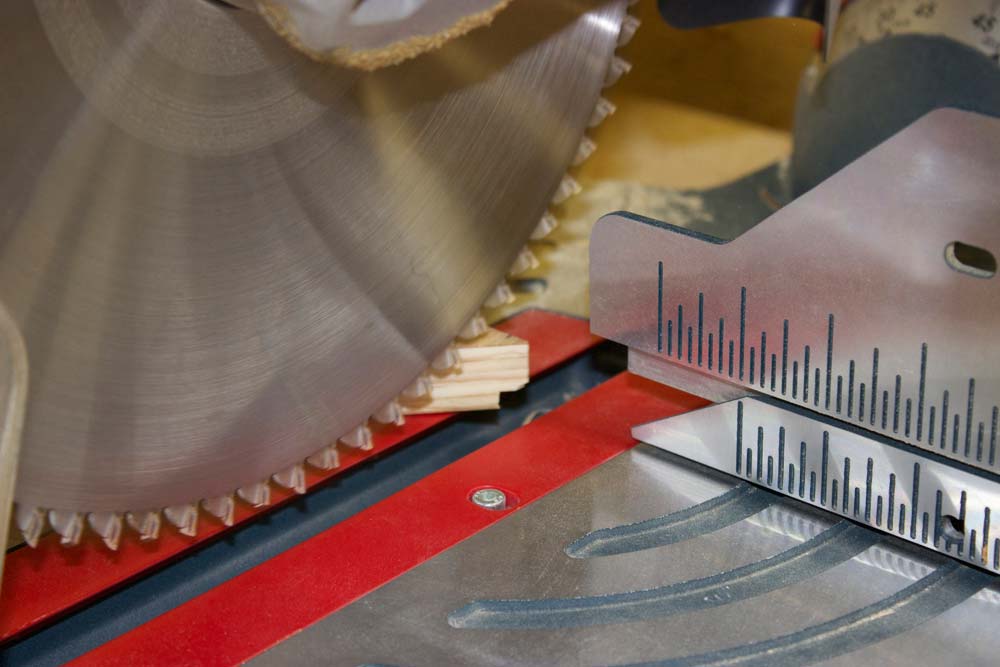
Figure 24 - Cut off ~1/4" of the point
|
At the miter saw, adjust the miter angle of the saw until the blade lines up with the line (~42.5-degrees) that was drawn at an angle across the middle piece earlier. Affix a stop block at the end of the board and make the cut. Repeat this cut on both the end pieces, being very careful of the left/right, inside/outside, and top/bottom orientations. The stop block should assure the pieces are all identical.
Stack all the pieces up and make sure the edges match up. Now is the time to fix it if they don't. The last step in prepping the sides and middle piece is to set up a stop block and cut off the "point" of the angle on the long side. The long dimension of the sides and middle pieces should be cut to 18-1/2"
From 1/4" sheet stock (Masonite, plywood, pegboard, etc.) cut two pieces 18-1/2" X 9-5/8" and two pieces 11-5/8" by 9-5/8". From whatever you can find lying around, make a back for this little storage unit. It should measure 8" X 20-3/4".

|

|
|
Figure 25 – Almost ready to glue-up
|
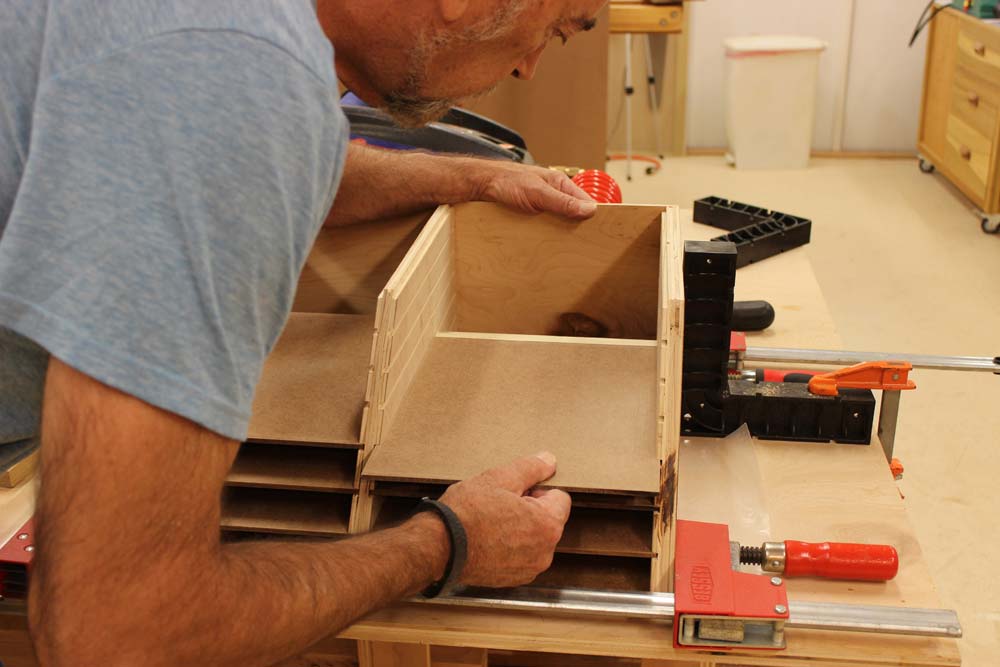
Figure 26 - The bottom shelf sandpaper
backstops being glued in place
|
Now is the time to mock up the assembly without glue. After clamping the pieces and making sure everything is square, measure across the bottom between the sides and the middle. This dimension should be 9-1/4" and should be the same on both sides, in the front and in the back. Also measure from the bottom piece to the beginning of the first groove. Cut two pieces to those dimensions from ?" stock. Mine were 1-1/16" X 9-1/4" long. You can see these two pieces at the top right of Figure 25 and in Figure 26.
Confirm the width for the shelves while the unit is in the clamps. They should measure 9-5/8". From the 3/16" Masonite, cut 12 "shelves" 11-3/4" long by 9-5/8" wide.

|
Figure 27 - After the first (bottom) shelf, each successive
shelf gets a cut-to-size backstop glued flush to its back edge
|
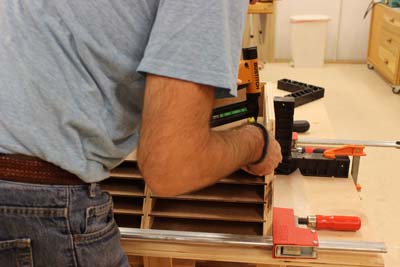
The glue-up may look a little daunting but may just be the easiest, most laid-back glue-up you have ever done… assuming everything was cut square and accurately. Before starting, draw a line across the two bottom pieces exactly 11" from the front edge. Then start by gluing the bottom pieces to the two sides and the middle. Glue the two 1-1/16" X 9-1/4" strips aligned to and behind the 11" pencil mark (see Figure 26). Then set the two top pieces in place without glue. With glue and a few brad nails, attach the back and use it to square up the whole assembly. Now put a little light clamp pressure across the unit at the front and back. Use a square to check the sides and middle to make sure they are vertical. You can take a break now, or keep on going.
I had a cup of coffee, then used the glue set-up time to cut a dozen scrap pieces of 3/4" poplar stock to 9-1/4" long. All of the scraps were at least 1-1/4" wide and some were even wider. These pieces will be the backstops for the shelves… they keep your sheets of sandpaper from sliding out the back. They are cut to final size as each shelf is installed.
The assembly goes quite easily from here on. Starting at the bottom, slide in the next shelf and align it with the front of the cabinet. Use a drop of glue if you want, but try to avoid drips and runs. Measure from that shelf up to the next groove and rip two pieces of the 9-1/4" long 3/4" stock to that exact size. Line each piece up with the back of the shelf and glue it into place. The 3/4" backstop will thus leave 11" of shelf space, exactly the length of a piece of sandpaper.

|
|
Figure 28 - Insert the next shelf and slide it
flush with the front edge
|
Figure 29 - A brad nail through the shelf and
into the backstop below ties
the entire unit together
|
After gluing on the backstops, slide in the next shelf, align it to the front of the cabinet, and repeat the process. At this point you can measure back from each shelf 1-3/8" and shoot a couple of brad nails through the shelf and into the backstop below. This will let you proceed on with the glue-up without waiting. Just be sure to check the distance from the front of the shelf to the backstop before shooting the nail (see Figure 29).
|
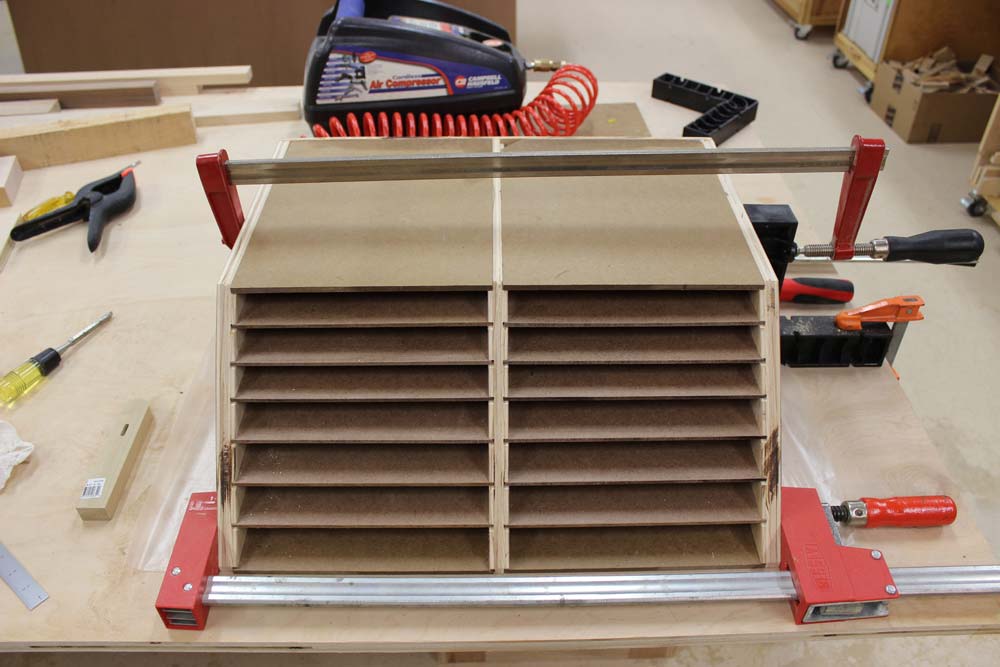
Figure 30 - When all the shelves are in place, glue the top pieces
into the rabbets and clamp everything together for a couple of hours
|
When all the shelves are in place, trim to size and attach the final backstops and then glue the tops into the rabbets. At this point you may want to put another clamp across the top of the assembly. Let all the glue dry and finish up with a light sanding and apply whatever finish you like or leave it bare. I decided not to spend time applying a finish, but I did sort out all my sandpaper and make labels for the sides of the bins.
If you are placing this sanding sorter in a drawer, nothing else is needed. If you intend to move it around a lot or hang it on a wall, cut a solid piece of plywood to span the bottom and glue it into place to give some additional rigidity to the unit. Mine needed to fit inside a drawer just a tad over 8" high, so I didn't add a bottom to the unit. If you want to hang the unit from a wall, a French cleat across the back will do well.
As I built it, the sandpaper sheet sorter/storage unit will hold 14 different kinds/grits of sandpaper. Each shelf can hold up to 50 sheets of sandpaper depending on the grit. The design is easy to modify. You could build just half of it, make it taller, make it shorter, or make more space between the shelves to accommodate more sheets (in case you buy in bulk). Hopefully you will get some ideas and build one of these for your shop. If you do, be sure to send us a picture for the Highland Woodworking gallery!
(Page 2 of 3)
Previous Page
1
2
3
Next Page
Return to
Wood News
front page