 by Steven D. Johnson
Racine, Wisconsin
(Page 2 of 2)
Previous Page
1
2
Dado Depth Torture Test
Okay, grab that old Bee Gees album (come on, I know you have it), cue up "How Deep Is Your Love" and in your best falsetto voice – tight harmonies everyone – let's sing the [new] chorus...
How deep a dado
I really need to learn
Cause we're living in a world of tools
Making a joint
And we really just don't know
How deep, how deep, we should go
Admittedly I'm really not a huge Bee Gees fan and that song is not on any playlist in my iPod, but it did pop into my head when good friend and loyal reader Dale asked, "Why do you make your plywood dadoes 1/4" deep?" His question struck some sort of chord. The question is a good one and the reason it struck the chorus' opening Dmaj7 chord is pretty simple, actually... I have no earthly idea.
Yep, that's the fact. I don't know if someone taught me to make dadoes one-third the depth of the material, whether I read it somewhere, or whether it was simply a bit of information floating in the ether from which, by the way, I periodically draw inspiration and even sometimes self-assured, (albeit occasionally misplaced) conviction. By the way, in my dreams the ethereal voices are never falsetto. The voices I hear sound more like Dean Martin. Anyway…
Dale asked, "Wouldn't a deeper dado be stronger?" And in the next sentence said, "Of course a deeper dado might weaken the plywood." Well, we woodworkers are natural-born experimenters and, truth be known, we kind of like to tear things up and make noise from time to time, so I thought a dado torture test would be a lot of fun.
|
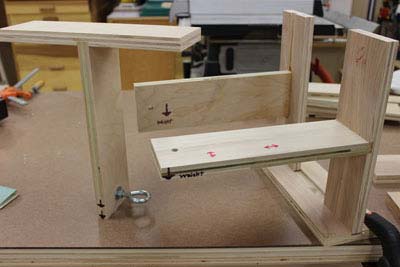
Figure 4 - The three tests - on the left, the "pull" test,
in the back, the "tear," and in the front, the "shear"
|
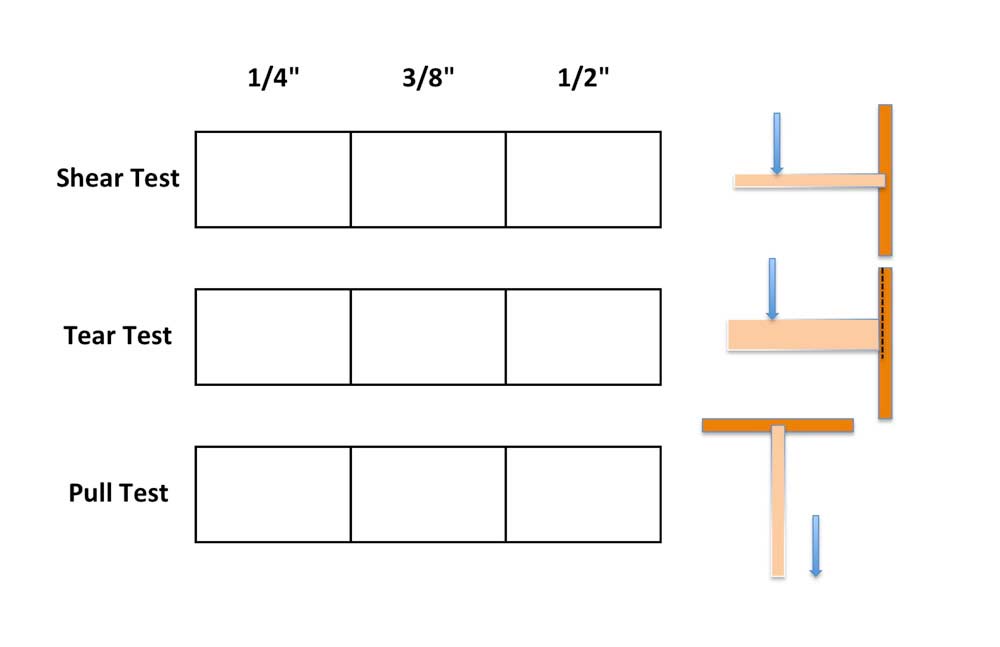
In box or cabinet construction there are likely three ways to destroy a joint. If you think of a shelf glued into a dado in the side of a bookcase, the weight of the books could break the joint in a direction I decided to call "shear." The plywood could be pulled straight out of the dado, a force I decided to call "pull." And if the joint were racked, the joint could effectively be torn in a direction parallel to the dado, a force I decided to call "tear." So with the three possible forces of failure identified as sheer, pull, and tear, the next step was to design a test.
Deciding on the test parameters was easy. I would test shear, pull, and tear strength on dadoes joints cut 1/4", 3/8", and 1/2" deep in 3/4" plywood. But designing the actual test fixture was more problematic. With no lab, no equipment, and no money, and a sincere desire to make the test as plausible as possible, I had to do some serious noodling.
Not knowing how strong any of the joints might prove to be, a rigid frame to hold the test pieces would be critical. Perhaps a chain or cable could be attached to one side of the joint, and a come-a-long or winch could provide the force. A spring scale could record the force up to the moment of failure. The only problem was, I have no chain, no winch, and no scale. A trip to the off-brand tool outlet quickly confirmed that even the no-name winches and scales were going to cost an arm and a leg. Don't get me wrong... I will gladly mortgage my financial future for a tool to test if it is a new tool that I want and will use in my shop on a daily basis. But I could see no future use for a winch or a scale, or wire, or chain, and I didn't really want to spend the money.
|

|
Figure 5 - It only took one screw to see that I would have
to predrill pilot holes... note the split on the right hand side.
|
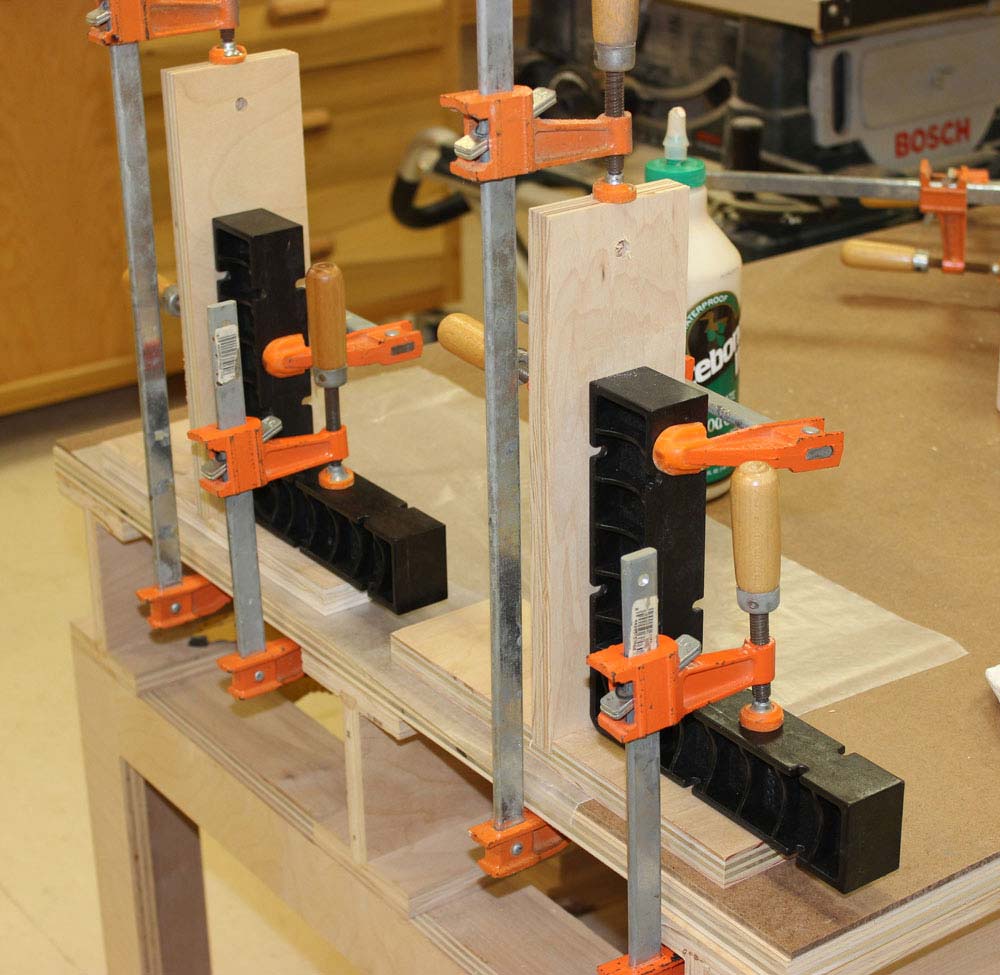
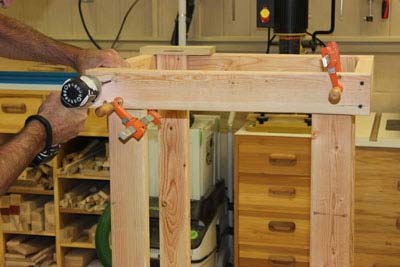
Figure 6 - Gluing up the test pieces
|
A cheaper test methodology had to be devised. So with five 2 X 4's, three feet of chain, half a dozen bolts, screws, glue, and some scraps scrounged from the woodpile, I built a stand I hoped would be sturdy enough to hold the test pieces. Of course, being a woodworker, I carefully squared the ends of the 2 X 4‘s, used screws and glue on all the joints, lots of clamps, squaring jigs, and more. In short, I generally over-built the thing.
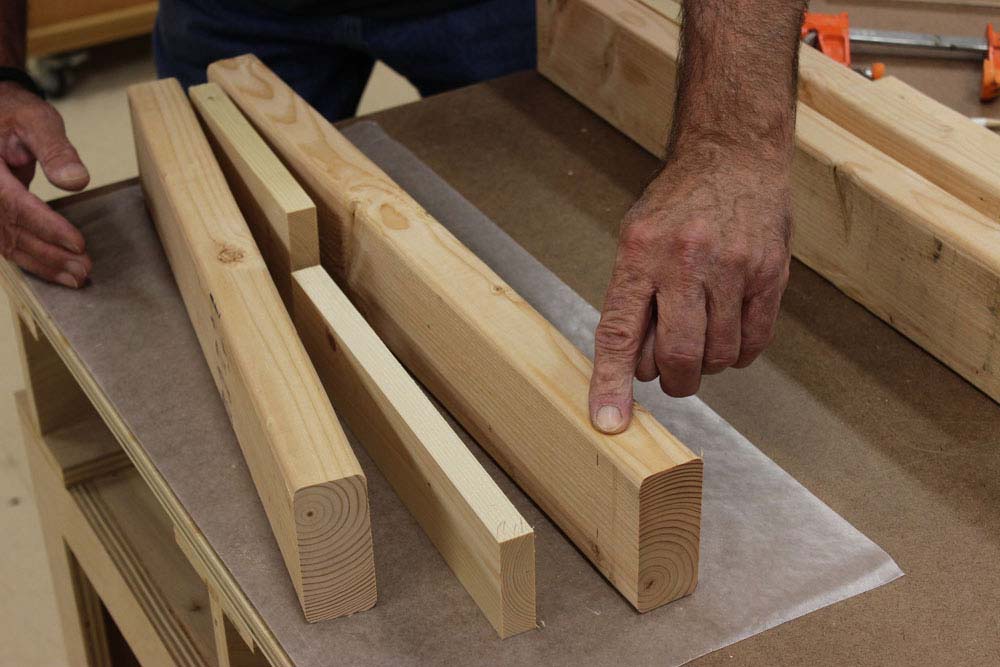
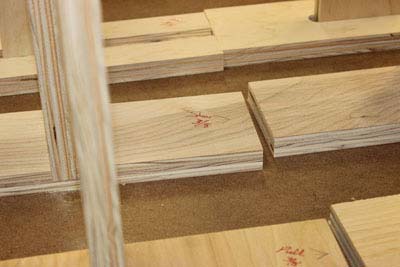
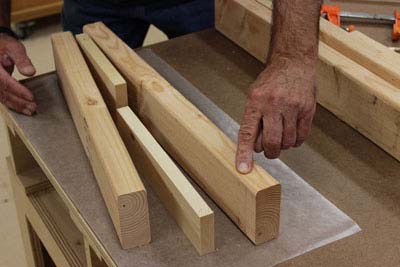
I figured I would need 18 pieces of plywood to make 9 joints (three directional force tests at three different depths). To eliminate any spurious variables that might taint the test, I cut all the test pieces from the same piece of plywood. I had to cut 25 pieces because, as you can imagine, some of the test pieces had visible voids in the plywood. The voids would likely weaken the plywood at those spots, so I cut until I got what appeared to be 18 pristine pieces. I cut the dados at the router table using the same undersize 3/4" plywood bit for all. The cut depths were set using my
Kreg Router Table Setup Bars
.
|
|
|
Figure 7 - All the test pieces were labeled carefully
|
Figure 8 - Making the "sandwich" groove
that will hold each sample
|
The next variable to eliminate was the amount of glue in each joint. Normally I am careful to avoid excess squeeze-out, but I figured that squeeze-out was the only way to assure that an ample, and hopefully the same, amount of glue was getting into each joint. It took two days, due to a shortage of clamps, but I finally got all the test pieces glued-up and ready.
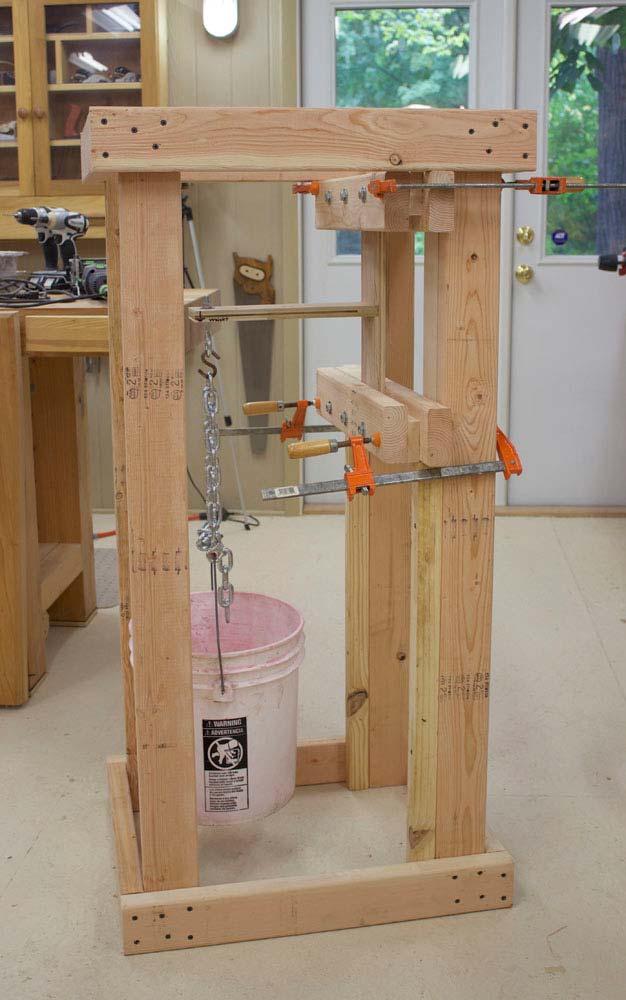
I set up a jig on the drill press to make sure the placement was identical, and drilled a 3/8" hole near the end of each test piece. Into that hole I mounted an eyebolt to which a chain would be attached. The chain was attached to an old (but clean) five-gallon bucket, and bricks (leftover from a garden pathway I built this summer) would serve as test weights. Certainly not fancy, but workable.

|

|
|
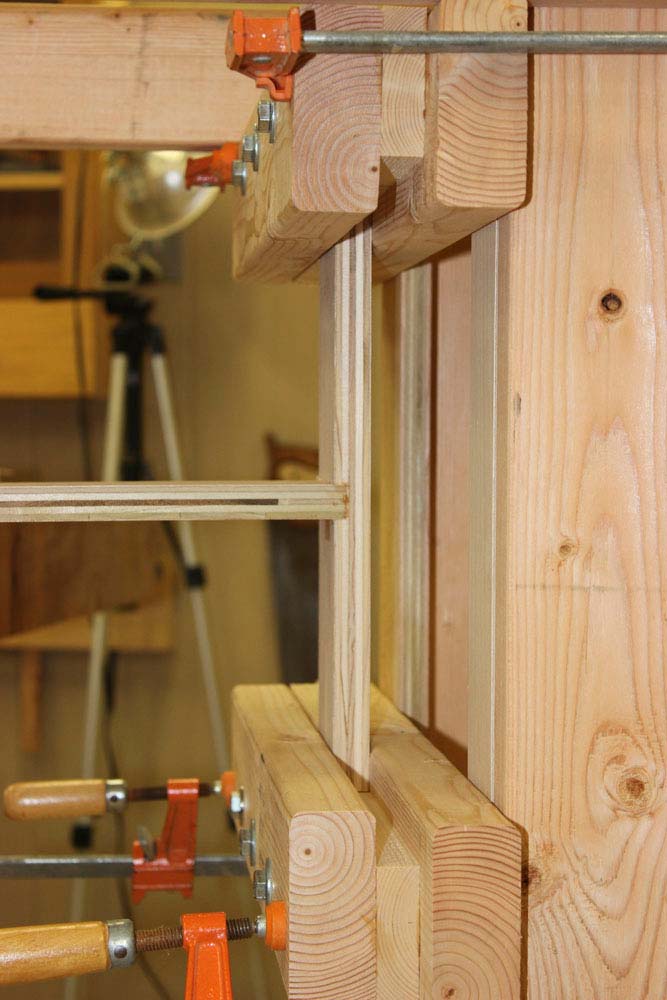
Figure 9 - Sample-holding fixture
|
Figure 10 - Complete test stand and test
sample holder, ready to intimidate neighbors
|
The contraption I built to hold the test pieces is a bit Rube Goldberg, but it is functional and provides repeatability. Each test piece slides into a groove made by gluing and bolting together a sandwich of a 2 X 4, a 3/4" thick piece of hardwood, and another 2 X 4. The 3/4" hardwood is actually 3/4", whereas the plywood is "nominally" 3/4" --- actually more like 23/32" - so the fit was "just right." I can slide in a test piece, perform the test, then remove it and slide in another without changing anything else in the set-up. The test piece holding contraption was simply clamped to the support frame for the "shear" and "tear" tests, then relocated to the top of the frame for the "pull" test.
On occasion, my neighbors have raised an eyebrow or two based on the sights and sounds emanating from my shop. But even with my history, they were surprised to see a strange 2 X 4 contraption, a bucket, a pile of bricks, and a video camera in my driveway. There was considerable "gawking." One creative gentleman suggested my test fixture could be used to interrogate detainees. I didn't pursue that conversation further.
The testing was actually a lot of fun, and the results were somewhat surprising. But seeing is believing and a picture is worth a thousand words as the old sayings go, so click
here and watch the video
. But before you do, below is a little chart you can use to make your predictions… see how many you get right. Which dado depth do you think will be the strongest in each of the three directions?

|
Figure 11 - Use this chart and make your best guess as to which dado
depth is the strongest!
|
Can't wait to know the answers? Click
here, and see the results of the dado depth strength torture test on our Highland Woodworking Blog
. And while you are there, let us know what depth you make your dados and why!
Next month in the Down To Earth Woodworking Shop, join us for a simple-to-build wall-hung drill bit rack, a survey of woodworkers' "other" interests (is there something besides woodworking?), and a step-by-step tutorial on how to un-learn a poor technique. Okay, maybe you don't have any bad techniques, but I sure do! Oh, and I have a new "Happy Light" --- you will want one, too!
(Page 2 of 2)
Previous Page
1
2
Steven Johnson is retired from an almost 30-year career selling medical equipment and
supplies, and now enjoys improving his shop, his skills, and his designs on a full time basis
(although he says home improvement projects and furniture building have been hobbies for most of his
adult life).
Steven can be reached directly via email at
downtoearthwoodworks@me.com
.
Return to
Wood News
front page